Painting Hydrangeas in a Jar: A Simple and Soothing DIY Art Project
May 16, 2025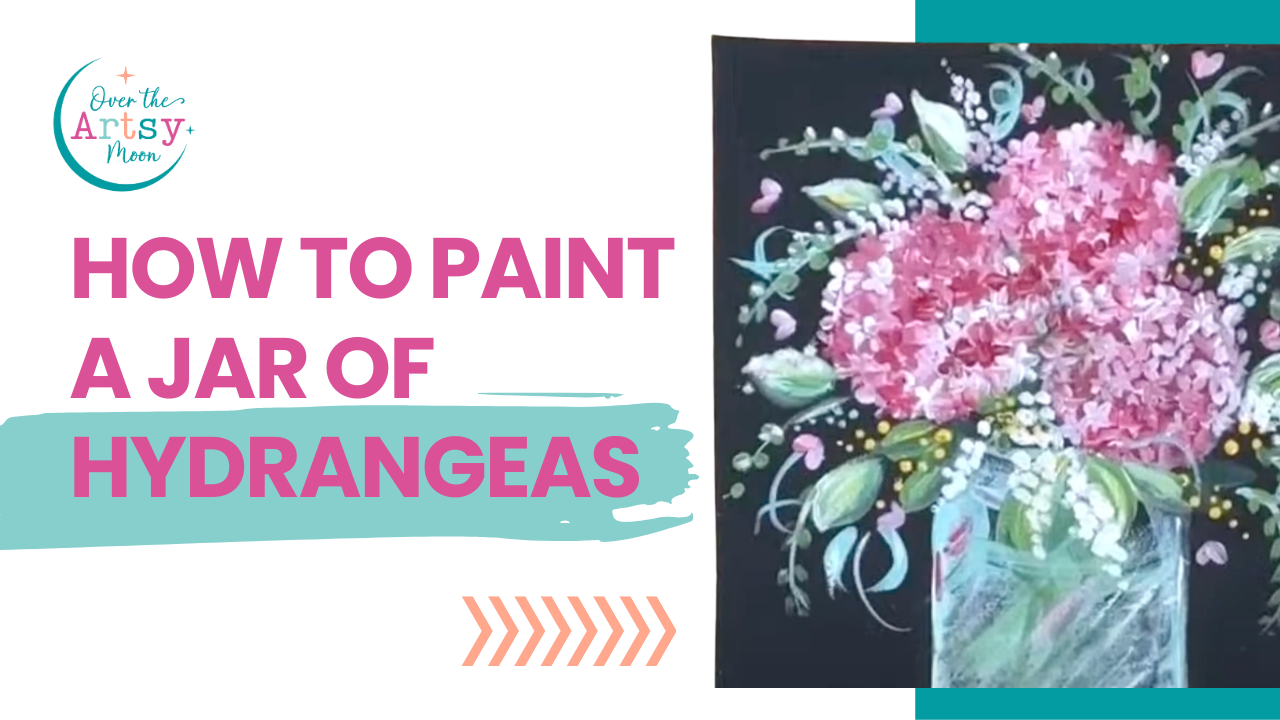
Hi everyone! It’s Karen from Over the Artsy Moon, and today I am so excited to walk you through a calm and cozy painting session—perfect for beginners or anyone who just needs a relaxing creative break.
In this tutorial, I painted a pretty little jar of hydrangeas on a black canvas background over on my YouTube Channel. You can watch the replay here. It’s simple, forgiving, and oh-so-pretty when you’re done. Let’s dive into the highlights and some tips I shared along the way.
The Background: Bold & Black
I started by painting my canvas with black acrylic paint. This gives a dramatic backdrop that really makes the colors pop—especially those soft hydrangeas and vibrant greens. If you’ve never painted on a black painted surface before, give it a try! It adds depth and contrast without much effort.
Sketching the Jar
Using Dutch Aqua by FolkArt, I freehanded the shape of the jar. Start with two vertical lines, curve the bottom, and lightly curve the top to give that classic mason jar shape. It doesn't have to be perfect—glass is forgiving, and it’s more about creating the illusion of transparency than being exact.
I used my fingers to blend in some white highlights and blue shadows, making the jar look a bit translucent. It’s okay to get messy—finger painting can be fun and really effective for blending!

Painting the Hydrangeas
Now for the fun part: flowers! I used white and red to create various shades of pink. If you’ve got hydrangeas in your yard, you’ll know they can shift color depending on the soil. (Anyone else notice their blue hydrangeas turning pink?)
To paint them, I used a “press and lift” method—just five dabs per flower to suggest petals. Don’t overthink it! The goal isn’t perfection but a soft, natural look. You can always come back and layer in more color, texture, or highlights.
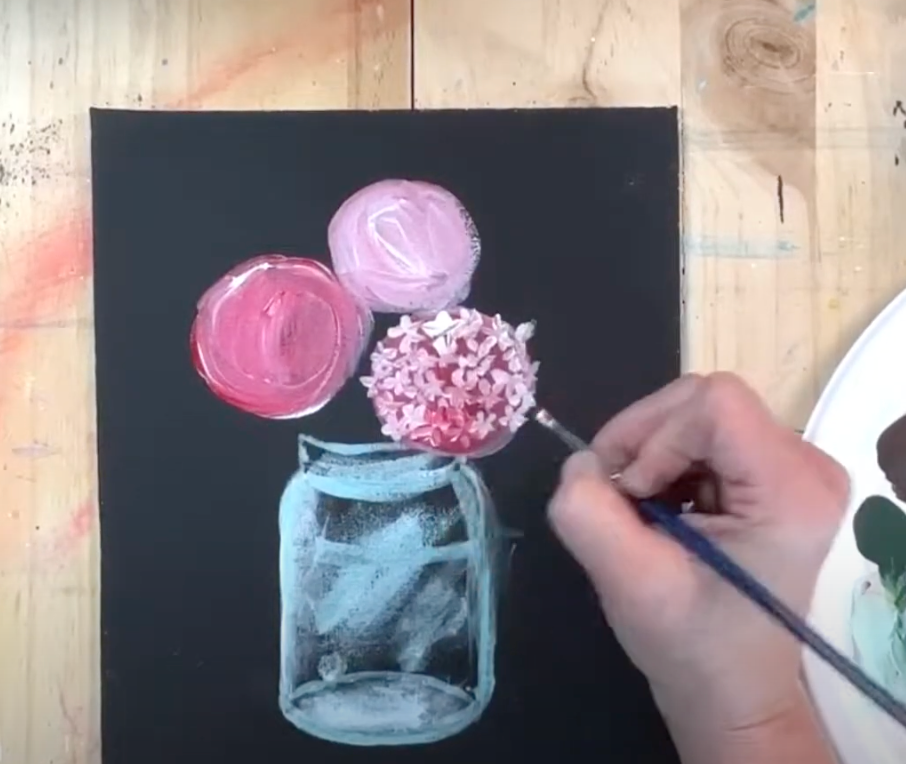
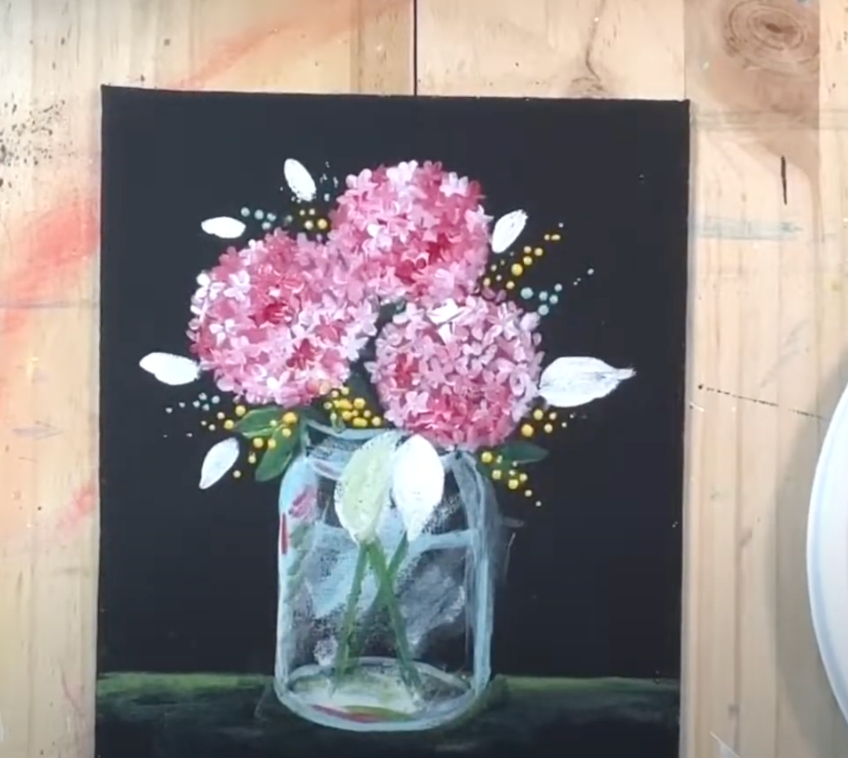
Adding Leaves & Greenery
Using a mix of hunter green and a lighter shade called “Fresh Cut Grass,” I pulled in stems and leaves. Loose strokes and a few finger smudges go a long way. These don’t need to be botanically correct—just add enough to balance the piece and break up the background.
Pro tip: Nature is often asymmetrical. Odd numbers, overlapping shapes, and uneven spacing will make your bouquet feel more real.
Finishing Touches
To tie everything together, I added dots in yellow and aqua for extra texture and whimsy. I used the back of my brush to place them with control, letting the colors from the jar repeat throughout the composition. This creates visual harmony and makes the painting feel cohesive.
Let’s Talk Art & Confidence
Throughout the session, I shared something I truly believe: Everyone is creative. You can paint—even if you’ve never picked up a brush before. It’s all about practice, patience, and giving yourself permission to play. You don’t need natural “talent,” just a little time and a willingness to try.
Want to Paint with Me?
In my membership, the Artsy Moon Paint Club, you’ll get full-length tutorials, tracers (so you don’t have to draw everything yourself), and tons of encouragement. Whether you're a total newbie or just looking for more creative time, it’s a great way to grow your skills and confidence. Come join us and see all the fun for yourself!
Until next time—keep creating, keep practicing, and don’t forget to enjoy the process!
Stay connected with news and updates!
Join our mailing list to receive the latest news and updates from our team.
Don't worry, your information will not be shared.
We hate SPAM. We will never sell your information, for any reason.
