A Mermaid-Inspired Painting Tutorial
Jul 10, 2025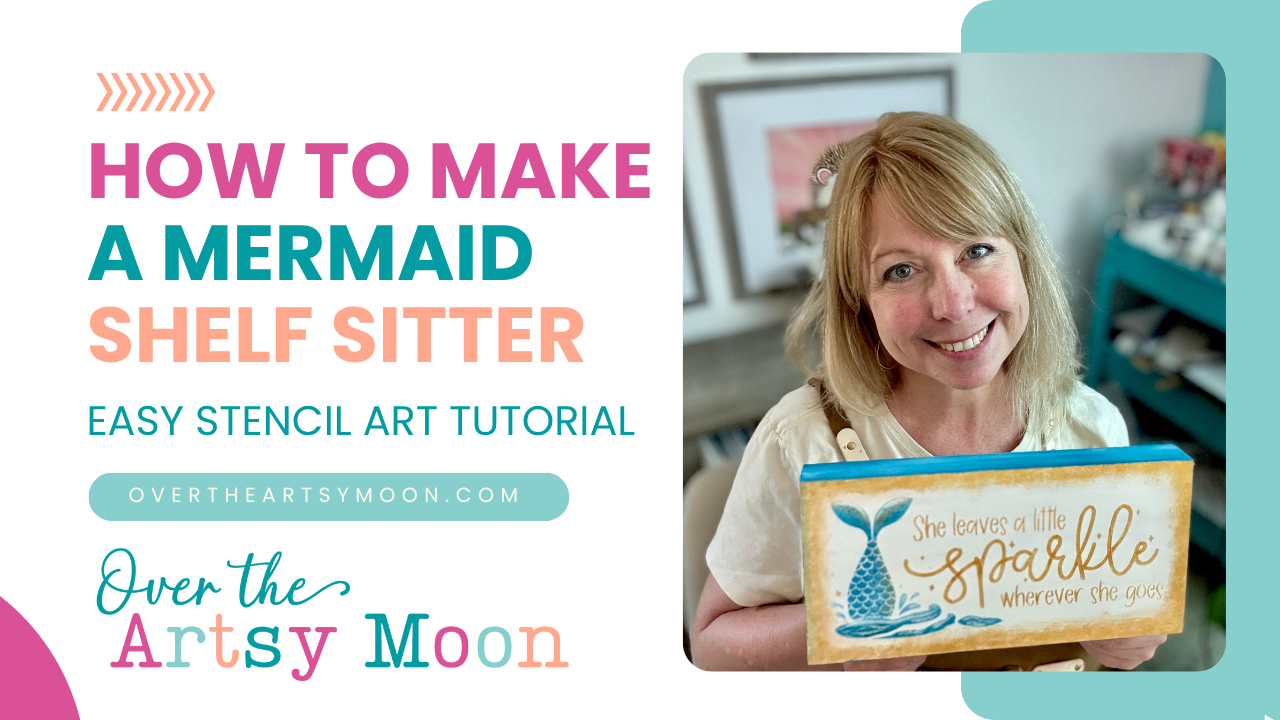
Hi friends! Today, I’m excited to share a magical, sparkly painting project with you — She Leaves a Little Sparkle Wherever She Goes. This mermaid-inspired design is perfect for anyone who loves a little shimmer, a little whimsy, and a whole lot of creativity.
We’ll be using this beautiful stencil from The Stencilsmith (they’re my number one pick for stencils, because they are great quality and made in the USA). If you’d like to grab your own, you can use my affiliate code ARTSYMOON (all one word) at checkout for a discount! Please note, I will receive a small commission if you decide to purchase with my code. Let’s dive right in and get started!
Supplies You’ll Need:
- Stencil brush (medium size works great)
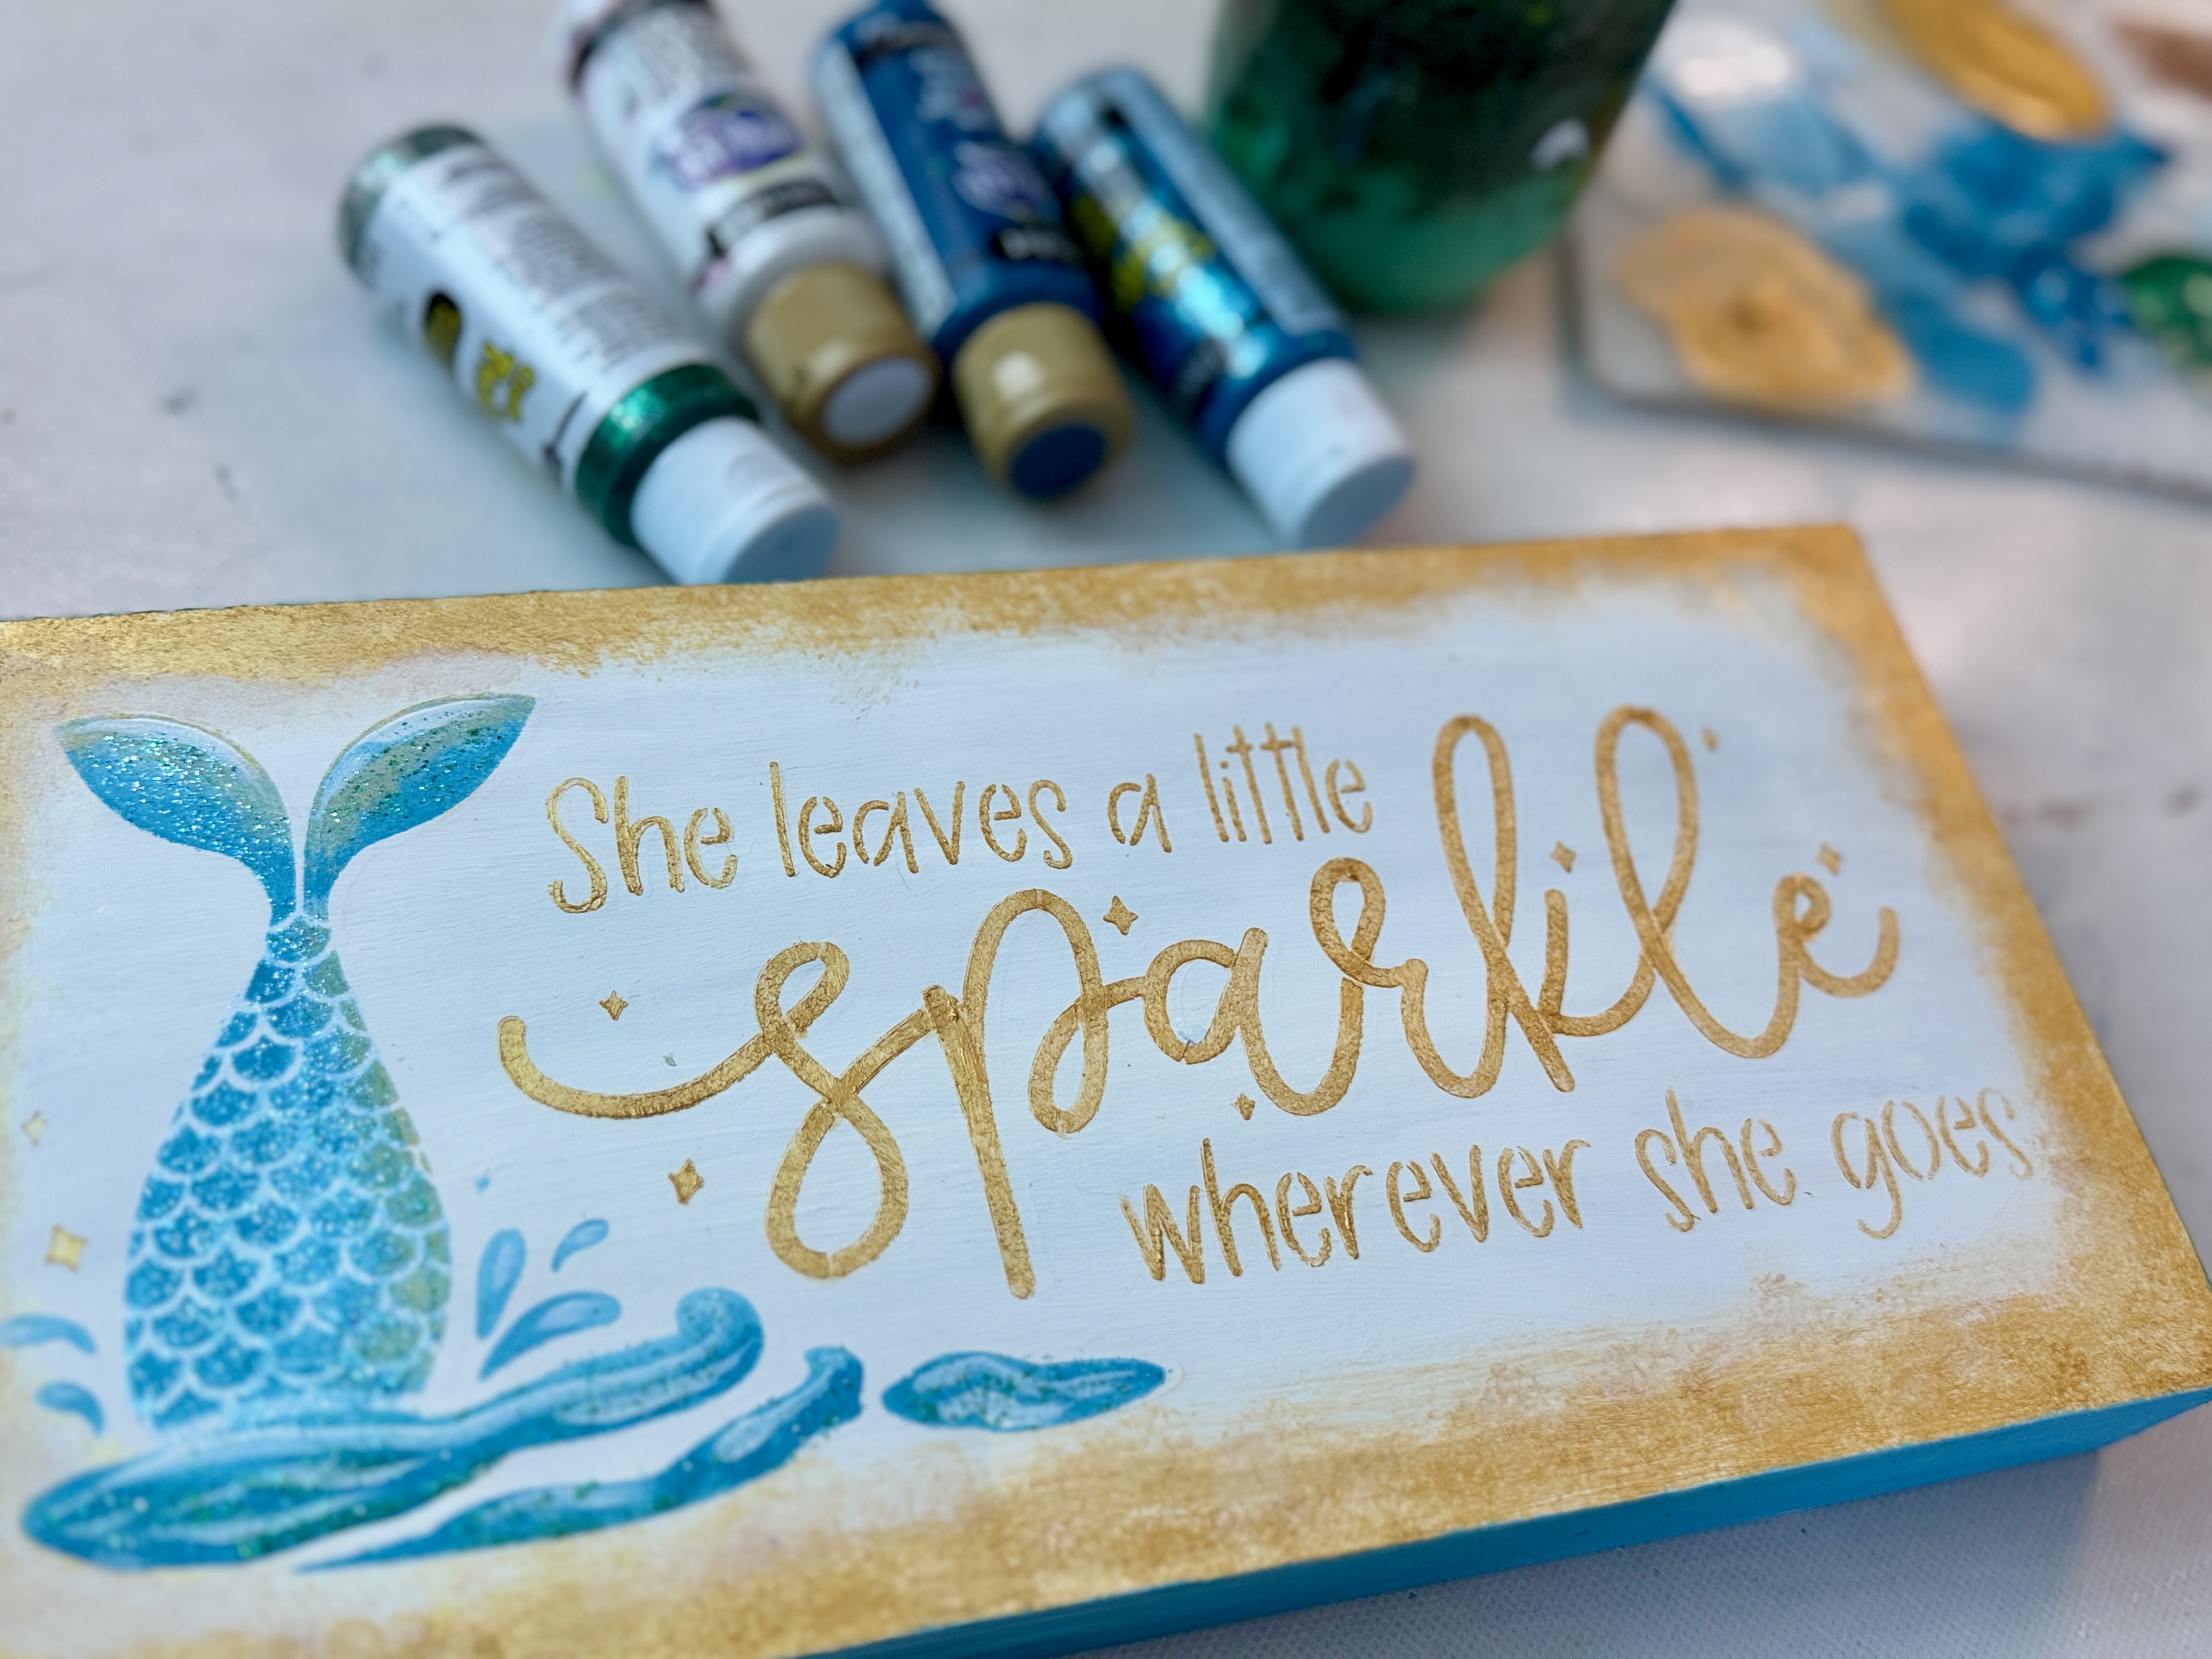
- DecoArt Craft Twinkles in Galaxy Blue, Tropical Blue, and Christmas Green
- Liquitex Basics Acrylic in Gold
- White acrylic paint
- Stencil (I used size small) - use my code ARTSYMOON to save!
- Wood panel or canvas — mine was a 6x12” wood block about 1.5” deep
Step-by-Step: Painting Your Project
First things first I place my stencil on the project surface! I start by adding a touch of gold to the surface using a dry stencil brush. Don’t rinse your brush while you stencil — keep it dry, load the paint into the bristles, and tap off excess onto a rag before lightly swirling over your stencil.
Work in light layers to avoid paint bleeding under the stencil edges. I did one layer over the lettering and stars and dried it quickly before moving on to the next steps.

Once the first layer is dry, I added more gold around the edges of the wood panel, creating a soft gradient effect that fades into the center. You can build up the gold in layers for extra depth and sparkle.
Next, I focused on the mermaid tail and waves. Starting with white paint at the top of the tail, I gradually blended it into lighter and darker shades of blue as I moved down. The waves and splashes of water also got a mix of whites and blues to create movement and contrast.
To really bring the tail to life, I added some gold highlights to the curves and edges and softened a few areas with white paint where needed.
Then came the fun part — adding detail lines and shimmer! With a detail brush and white paint, I added delicate curved lines to the tail and waves, and then I layered on the Craft Twinkles glitter paint in blue and green for that magical, sparkling finish.
For the final touch, I painted the sides of the wood block in blended shades of blue and white to give it a polished, finished look.
Make It Your Own!
One of my favorite things about this project is how customizable it is. You can use different colors for the mermaid tail — pink, purple, rainbow — whatever makes you happy!
If you’re a mermaid fan, or know someone who would love this as a gift, this is such a fun, personal project to create.
Share Your Sparkle & Join the Club!
I’d love to see your version of this project. If you paint your own She Leaves a Little Sparkle Wherever She Goes, be sure to share a photo with me — it makes my day to see what you create!
And if you’re ready to dive deeper into your creativity, I’d love to invite you to join the Artsy Moon Paint Club. As a member, you’ll get access to exclusive tutorials, inspiring projects, and a supportive community of artists just like you. It’s the perfect way to keep painting, learning, and leaving a little sparkle wherever you go! Click here to learn more and join the Artsy Moon Paint Club.
Keep Creating!
If you’d like even more creative tutorials like this one, don’t forget to check out my YouTube Channel and subscribe! I share tons of fun, exclusive projects and tips, and I’d love for you to join our growing community of artists. Happy painting, and remember — wherever you go, be sure to leave a little sparkle behind!
Stay connected with news and updates!
Join our mailing list to receive the latest news and updates from our team.
Don't worry, your information will not be shared.
We hate SPAM. We will never sell your information, for any reason.
