Easy Stencil Brush Cloud Technique for Beginners
Sep 19, 2025
Have you ever wanted to paint fluffy, realistic-looking clouds in your acrylic paintings, but felt intimidated? The good news is—painting clouds doesn’t have to be complicated. In fact, with just a few colors and one special brush, you can create soft, layered clouds that look like they’re floating across your canvas. In this step-by-step tutorial, I’ll show you how to paint clouds using an easy stencil brush technique that’s perfect for beginners. To see the full tutorial, check out the video here.
Supplies You’ll Need:
Paint colors:
- White (any acrylic brand)
- Blue (I used FolkArt Cayman Blue)
- Burnt Umber (DecoArt Burnt Umber)
Brushes:
- A flat or bright brush (½ or ¾ inch works great) for your background
- A stencil brush (the secret to fluffy clouds!)
- Surface: Canvas, mixed media pad, or watercolor paper
- Optional: A rag or extra sheet of paper to place under your surface while painting
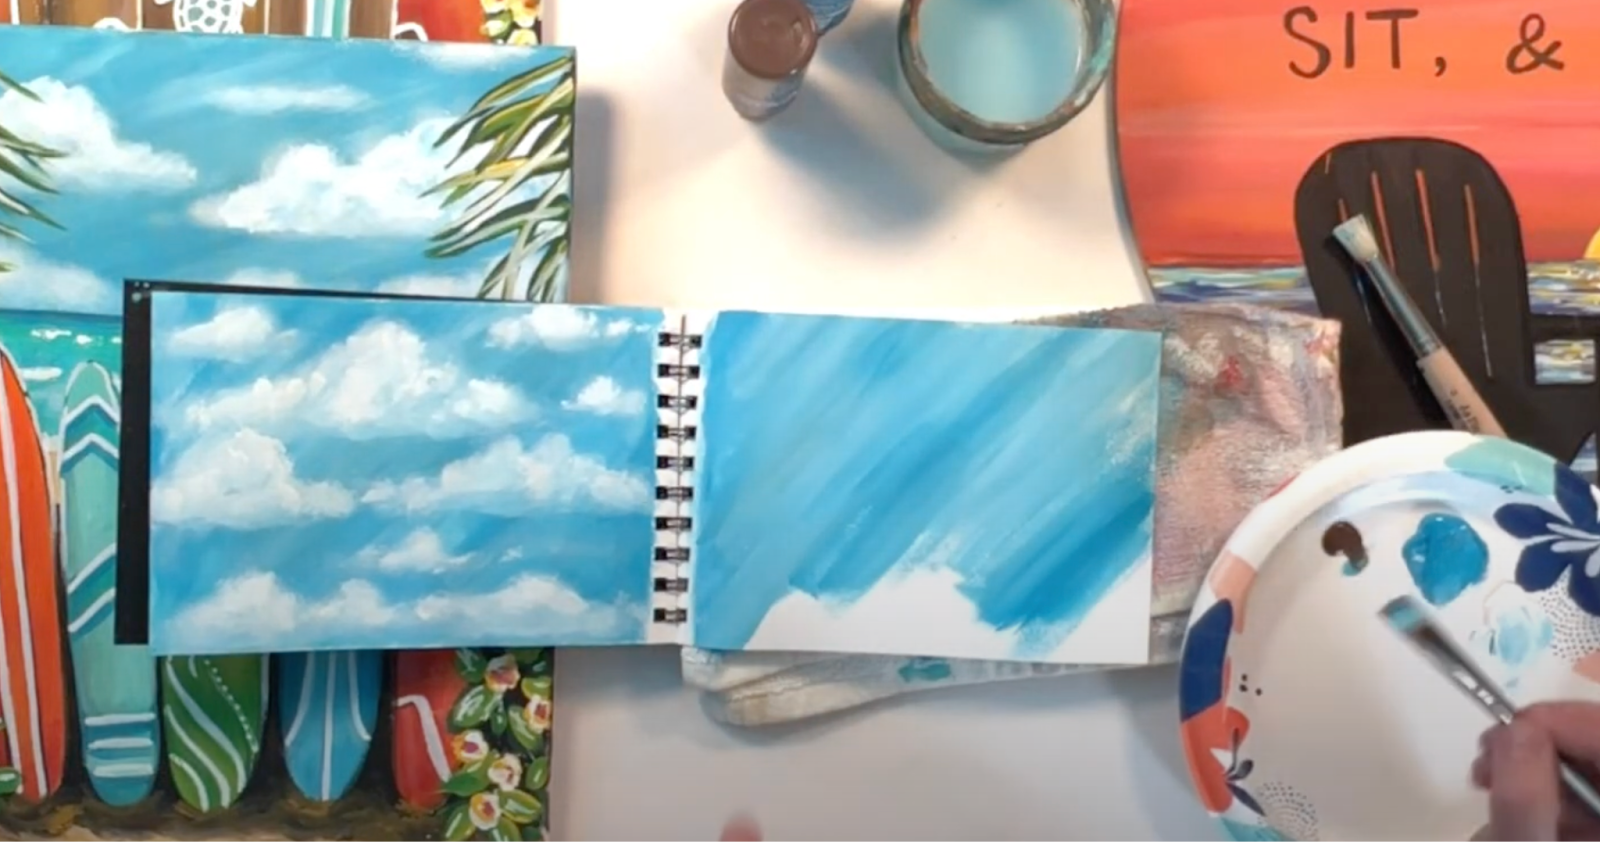
Step 1: Paint Your Sky Background
Start with your flat brush and lay down a simple blue and white blended background. Work in diagonal strokes to give your sky movement. If your paint feels sticky, add a touch of water or more paint to help it spread.
Once your base is down, add just a tiny bit of burnt umber. This tones down the brightness of the blue and gives your sky a more natural feel. Don’t worry if it looks messy—this is just the backdrop for your clouds.
Step 2: Load Your Stencil Brush
Dip your stencil brush into white paint and swirl it around to really work the paint into the bristles. For your first layer, mix in just a touch of blue with the white. This helps create shadowed areas within your clouds.
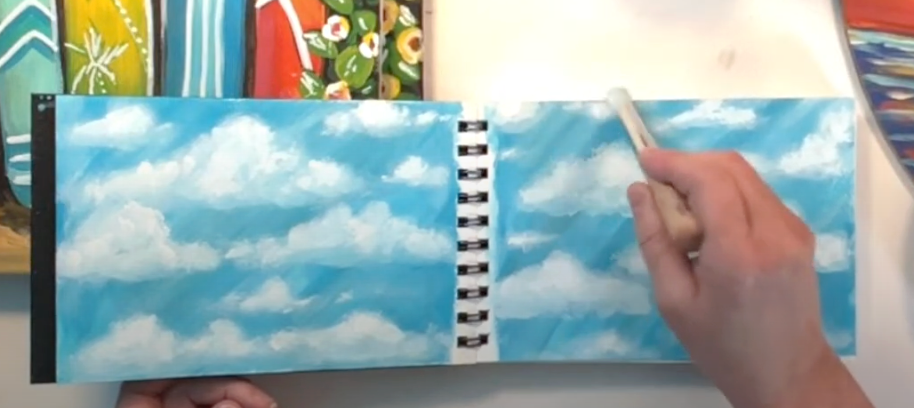
Step 3: Paint the First Layer of Clouds
Using a circular motion, start adding in cloud shapes. They don’t have to be perfect—some can be flat on the bottom and fluffy on top, others can be wispier. Think about how clouds look in nature: no two are the same!
Pro tip: Place smaller, thinner clouds near the horizon line, and larger, puffier clouds higher in the sky.
Step 4: Add Layers and Shadows
Once your first layer dries slightly, load your brush with more white paint. This time, use a pouncing motion (tapping gently with your brush) to create brighter highlights on the tops of your clouds. Be sure to leave some of the darker, shadowy areas from the first layer showing through. This contrast is what gives your clouds depth and softness.
Step 5: Brighten with Final Highlights
Finally, go back in with pure white paint and pick a few spots on your clouds to really brighten up. These small highlights make your clouds look three-dimensional and give them that glowing, sunlit feel.
Tips for Success
Clouds don’t need to be perfect! Some days you’ll make fluffier clouds, other days softer, wispier ones. Let your mood guide you. Experiment with background colors—warm tones like pinks, yellows, and ochres can create beautiful sunrise or sunset skies. If you don’t have a stencil brush, try an old, stiff paintbrush or even dabbing with your finger for a similar effect.
The Beauty of Painting Clouds
One of the best parts about painting clouds is that they’re never exactly the same—your version will always be unique to you. Whether you’re a brand-new painter or have been painting for years, this easy stencil brush technique is a fun way to add soft, dreamy clouds to your artwork.
So grab your brushes, swirl up some paint, and give it a try. You’ll be amazed at how easy and relaxing it can be to paint the sky! Want more step-by-step tutorials like this? Be sure to check out my membership, the Artsy Moon Paint Club!
Stay connected with news and updates!
Join our mailing list to receive the latest news and updates from our team.
Don't worry, your information will not be shared.
We hate SPAM. We will never sell your information, for any reason.
