How to Paint a Sparkler: A Simple and Fun Summer DIY
May 29, 2025
Hey there, glitter-loving creative! It’s Karen from Over the Artsy Moon, and today I’ve got a project for you that’s as fun as it is festive. Whether you're celebrating the Fourth of July, Canada Day, Memorial Day, or just feel like adding a little razzle-dazzle to your canvas, this DIY sparkler painting is perfect for you.
This fun DIY is part of a full tutorial that was created for the Artsy Paint Club (psst—if you’re not in yet, checkout this link to join the fun!), and it's so easy you'll be painting sparklers in your sleep.
What You’ll Need:
- Black acrylic paint (for the background)
- DecoArt Galaxy Glitter (we used Pink Cosmos and Red Nebula)
- DecoArt Extreme Sheen in 24K Gold
- DecoArt Bright Yellow, Warm White, and Lamp Ebony Black
- A small flat brush
- A liner brush
- A piece of cardstock or an old gift/hotel card
Step One: Let’s Get Started!
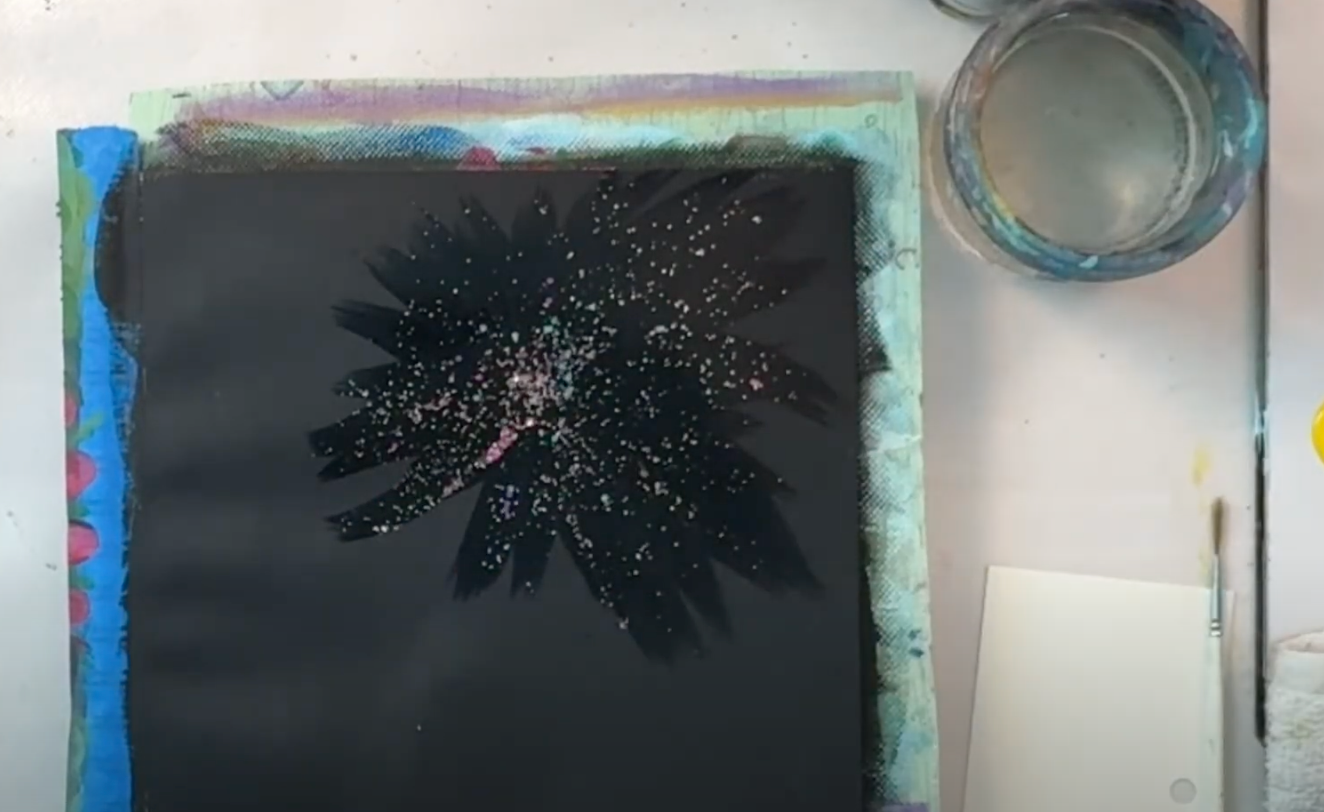
Start with a black background. I know, dramatic—but we’re going to be adding glitter, so we need that contrast! I used DecoArt’s Galaxy Glitter in “Pink Cosmos” and “Red Nebula” because they bring such a fun touch to your canvas! Once the background is dry, grab your glitter paint and choose the center point where your sparkler will burst out from.
Step Two: Paint the Stick!
Time to paint the sparkler stick! Just mix a little white and black to get a nice gray (or get wild and use whatever color you’re feeling). Add a slightly diagonal line through the glitter center—don’t stress if it’s not perfectly straight. Sparklers have personality!
Step Three: Time to Shine!
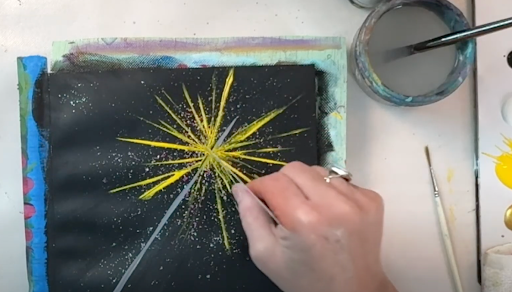
Now for the fun part—grab your piece of cardstock (or any sturdy plastic card) and drag it through some yellow paint. Lightly swipe or tap it out from the center in all directions. It doesn’t need to be perfect. In fact, the imperfections make it feel more alive and energetic, like a real sparkler!
Repeat the process with gold paint, then again with white. Layering these gives the sparkler dimension and movement. If you get a thick line or an unexpected blotch, no worries—it’s all part of the process and totally fixable.
Step Four: The Final Details
To finish off this fun piece, take a liner brush and add some fine, feathery strokes to create little asterisk shapes on the sparkler lines here and there. These can be little “pops” of white light that bring the whole thing together. Vary the sizes and directions so they look dynamic and natural. Finally, do the “squint test” to see if the artwork looks balanced.

Tip: If you’re not seeing the glitter pop quite the way you want, add a little extra once the base layer dries. You can have too much glitter in life, but in art? Never.
Check out the full video tutorial on my YouTube channel and don’t forget to like and subscribe!
How We Used the Sparkler in the Artsy Moon Paint Club
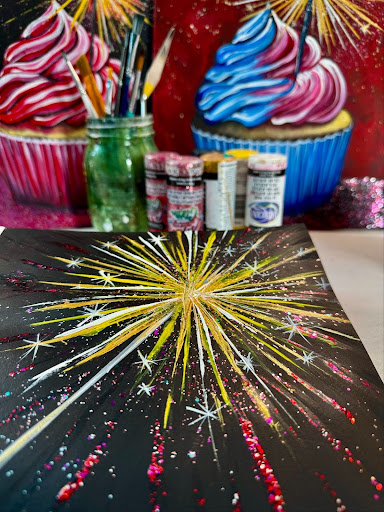
And there you have it—a simple, eye-catching project that adds a festive spark to your summer painting lineup. If you want to see how we used this sparkler design in a full project for an adorable cupcake topper, join us inside the Artsy Moon Paint Club to follow the complete step-by-step tutorial.
Stay connected with news and updates!
Join our mailing list to receive the latest news and updates from our team.
Don't worry, your information will not be shared.
We hate SPAM. We will never sell your information, for any reason.
