
How to Paint a Whimsical Purple Pumpkin — A Fun & Easy Fall DIY Project!
Oct 30, 2025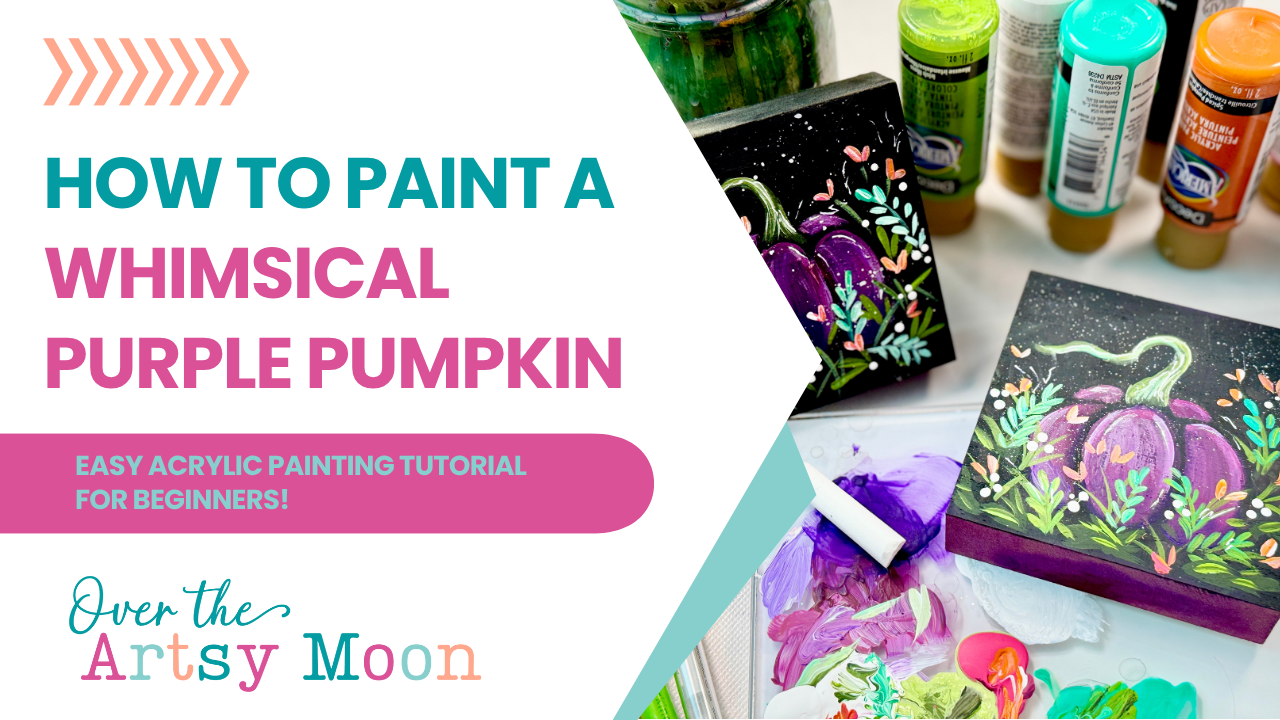
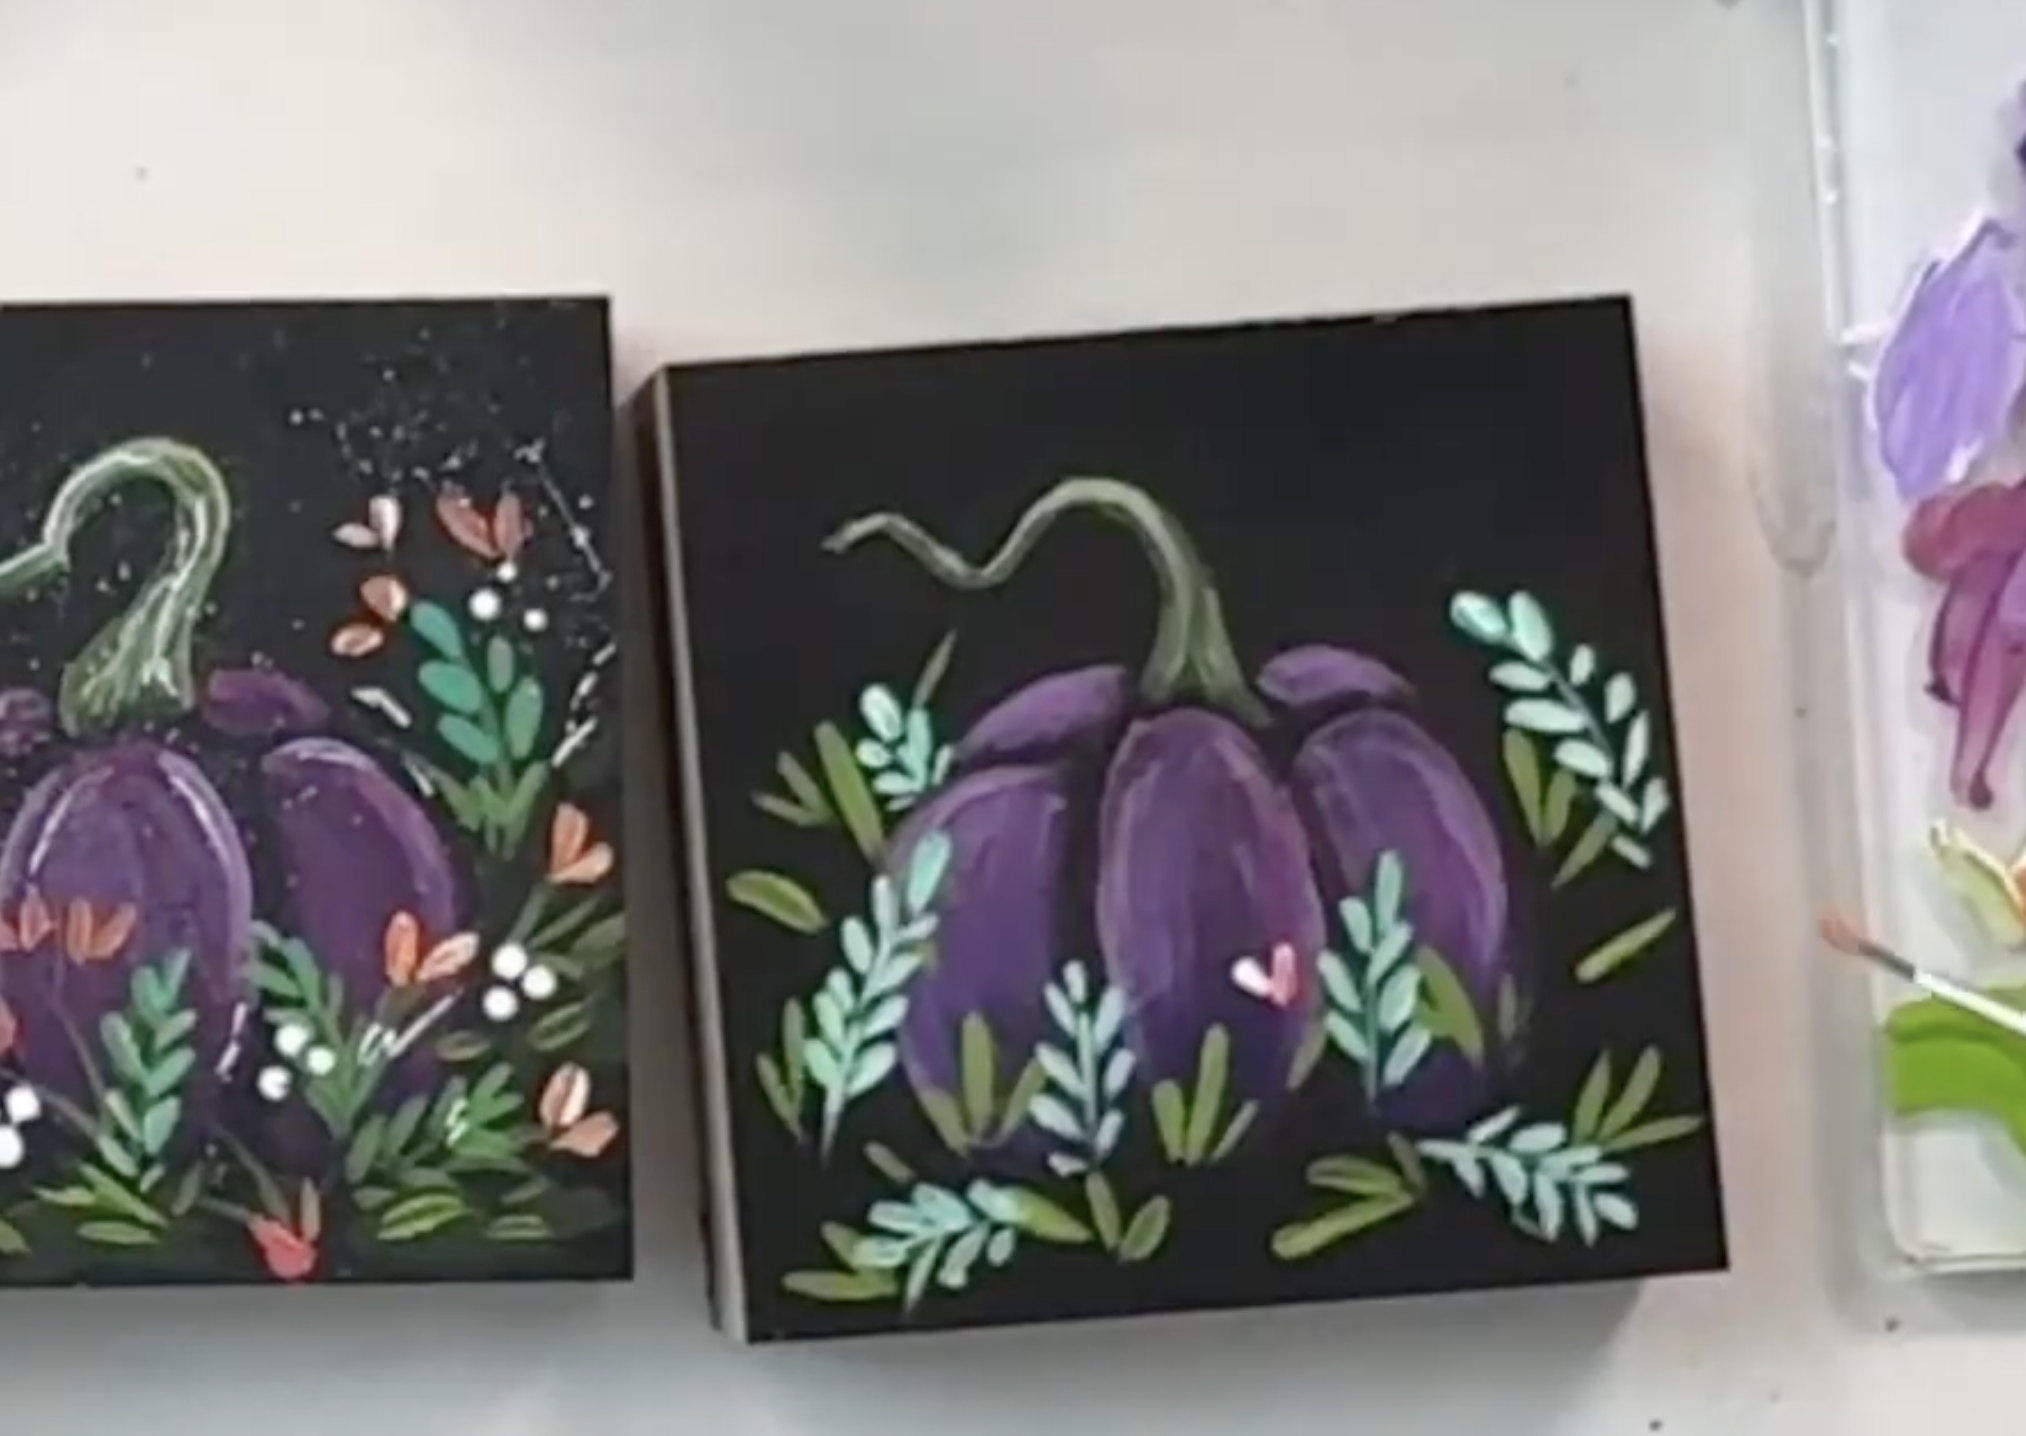
Hey friends! Karen here from Over the Artsy Moon, and today we’re bringing a little magic (and a lot of color!) to your fall décor with a Whimsical Purple Pumpkin painting.
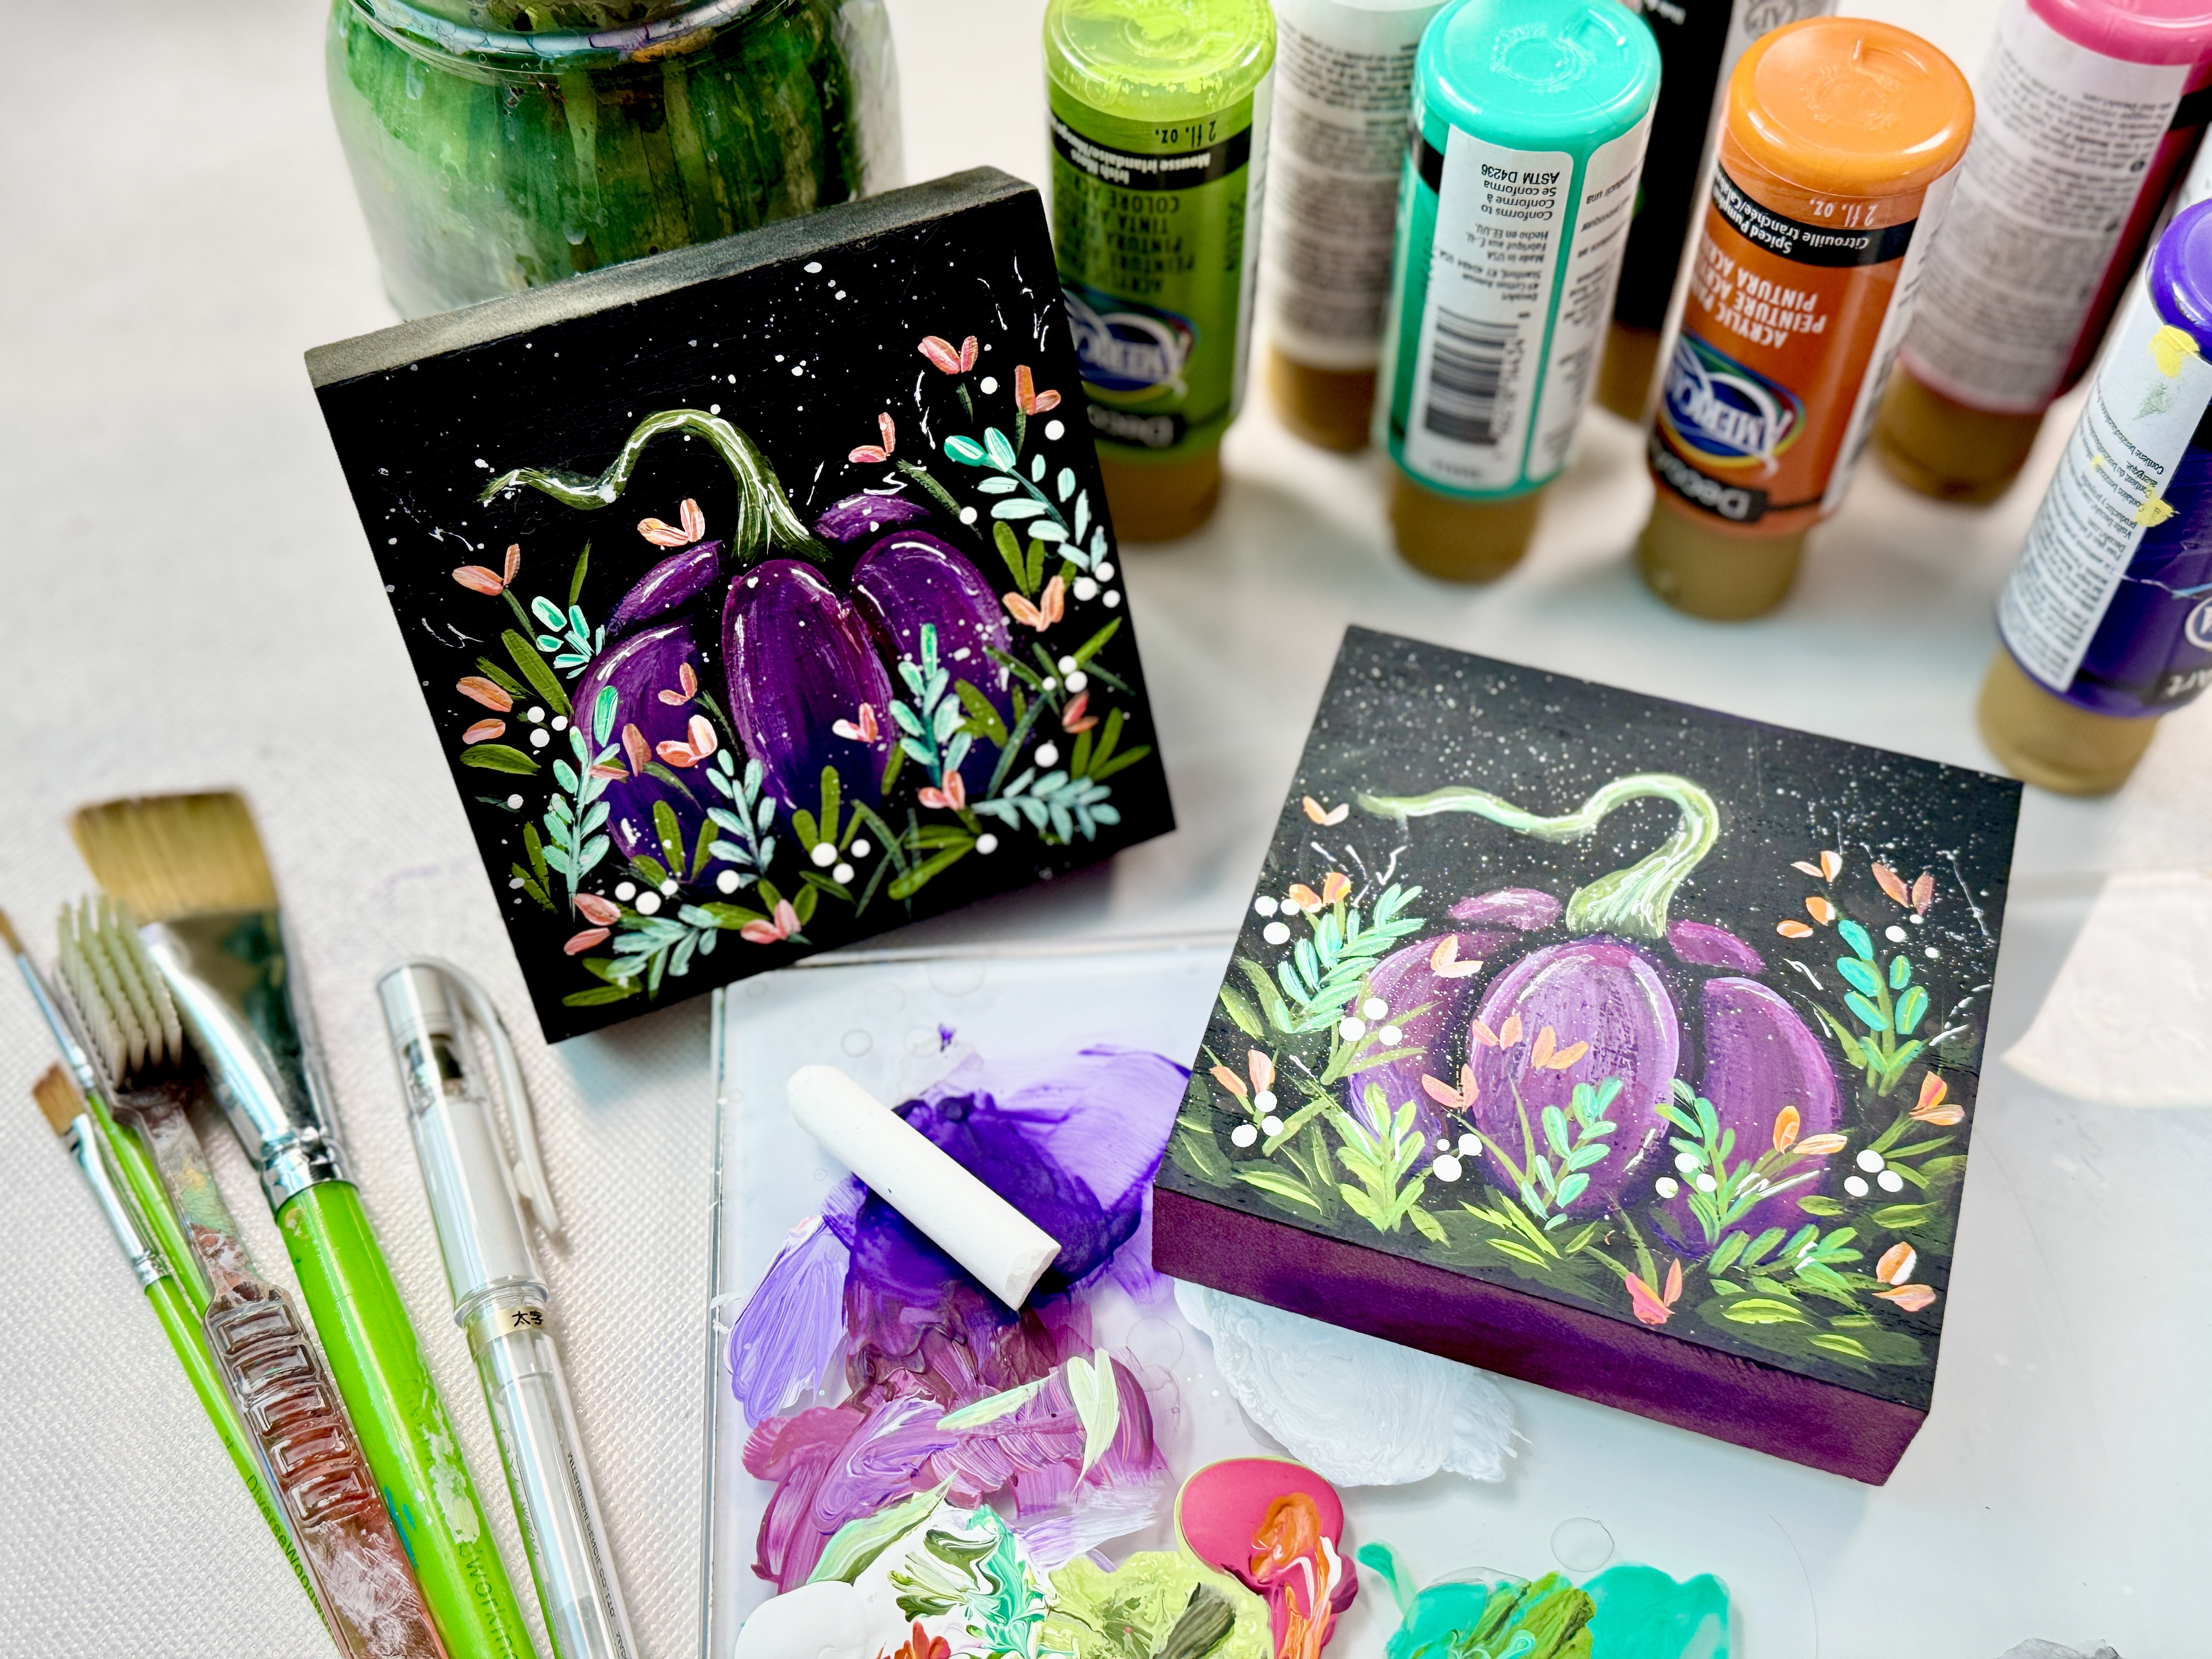
This quick and easy project is perfect for beginners or anyone looking to add a creative touch to their fall season. The best part? You can paint it on just about anything — I used a small 4x4” wood block, which makes for the cutest little shelf sitter!
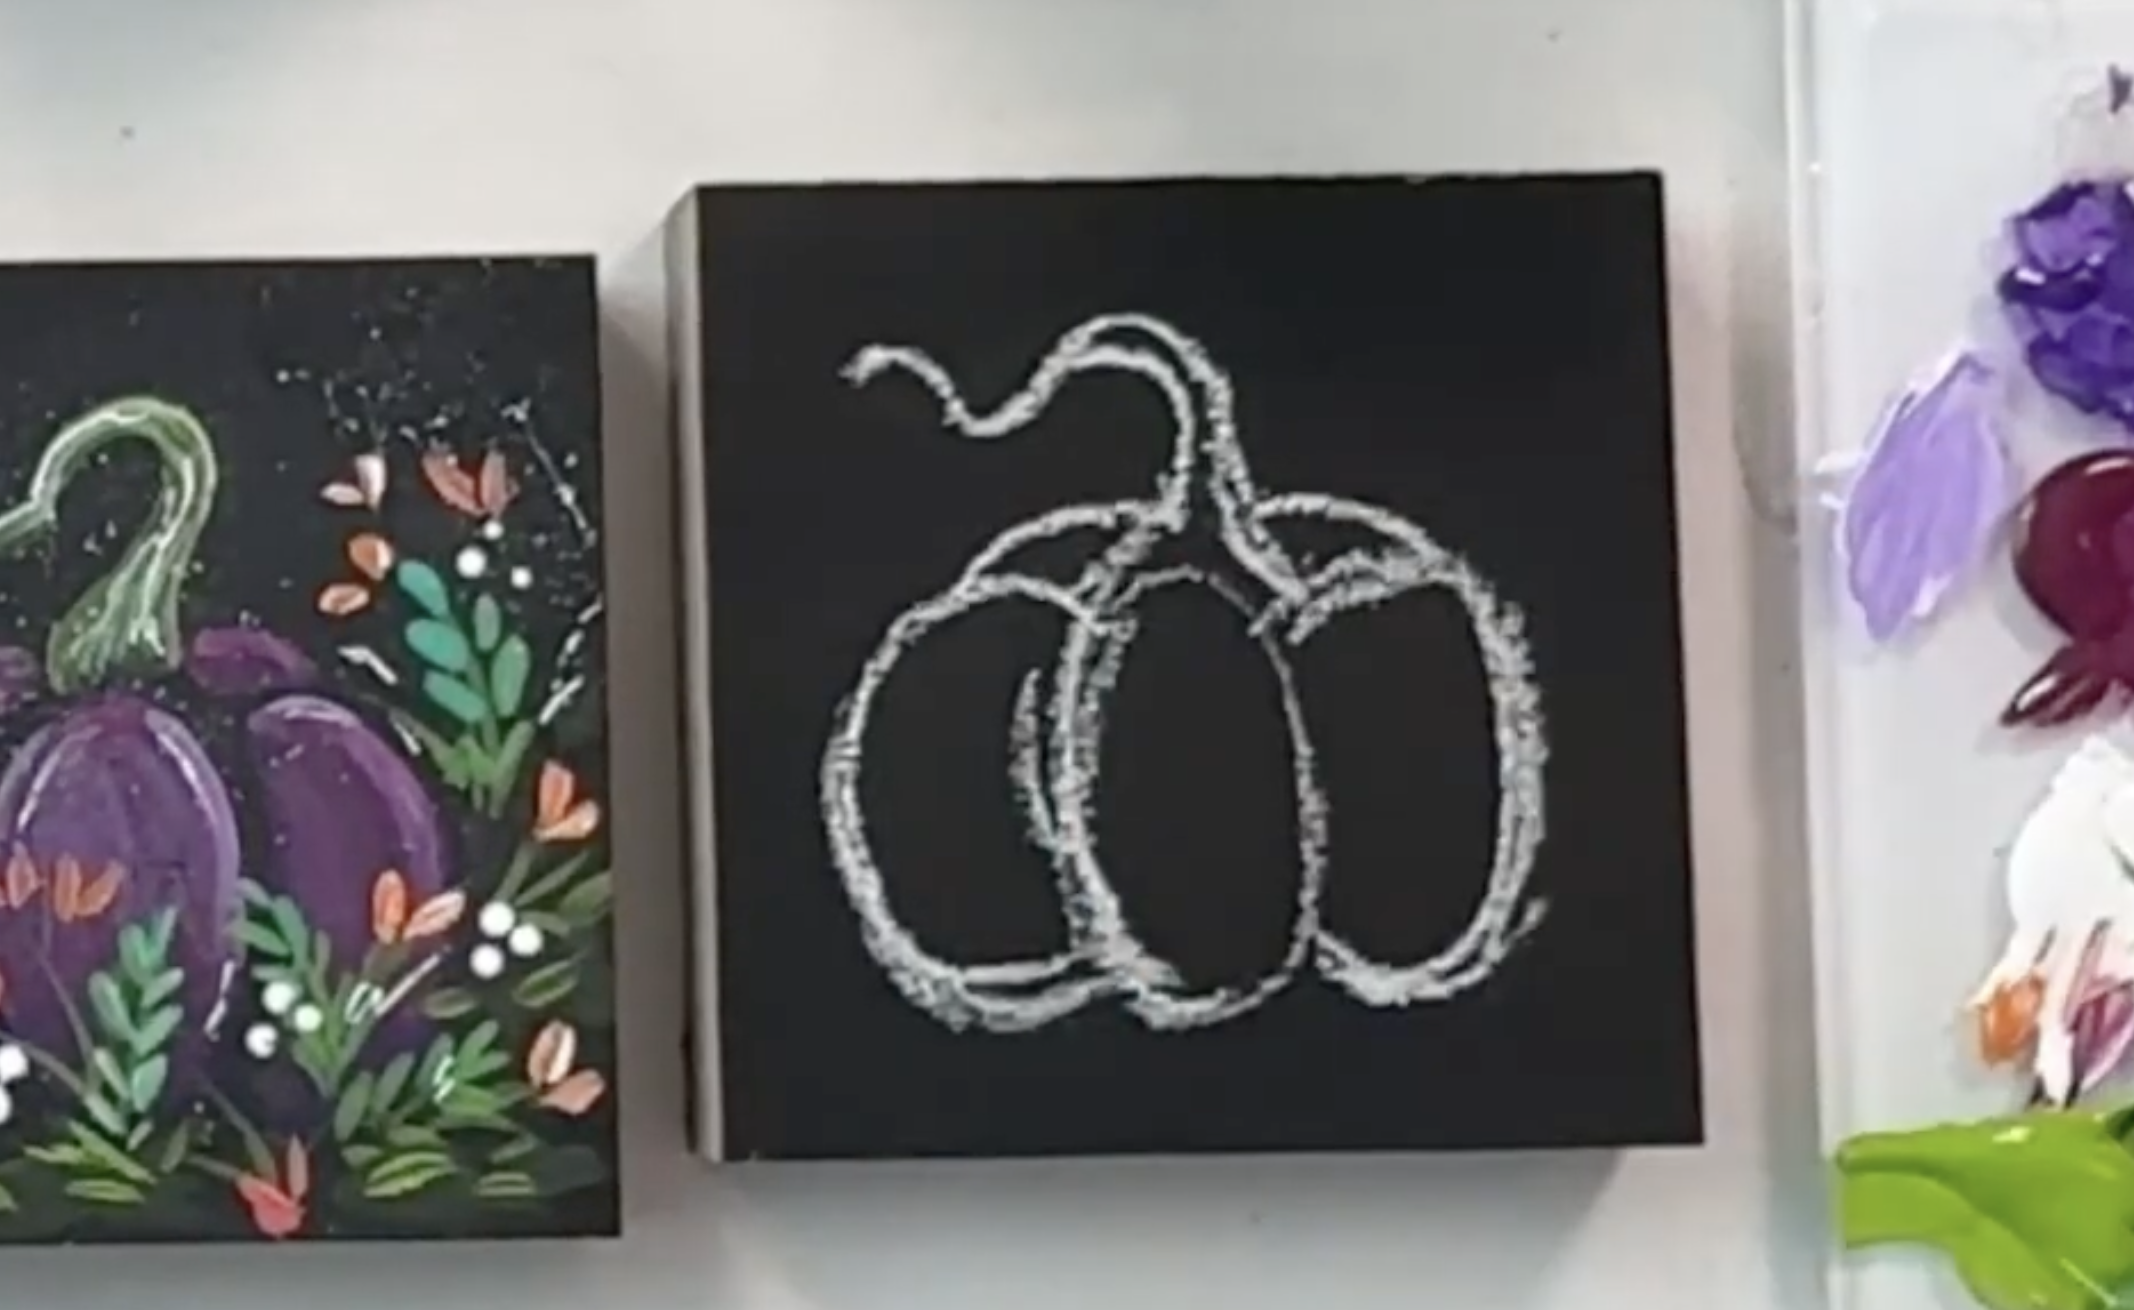
Step 1: Sketching the Pumpkin
Start with a piece of chalk and sketch out a simple oval shape. Add curved lines on each side to form the sections of the pumpkin. Don’t worry about perfection here, the charm is in the whimsy! Draw a fun, wiggly stem on top, almost like an upside-down “V.” Remember: this is your pumpkin, embrace the quirky lines!
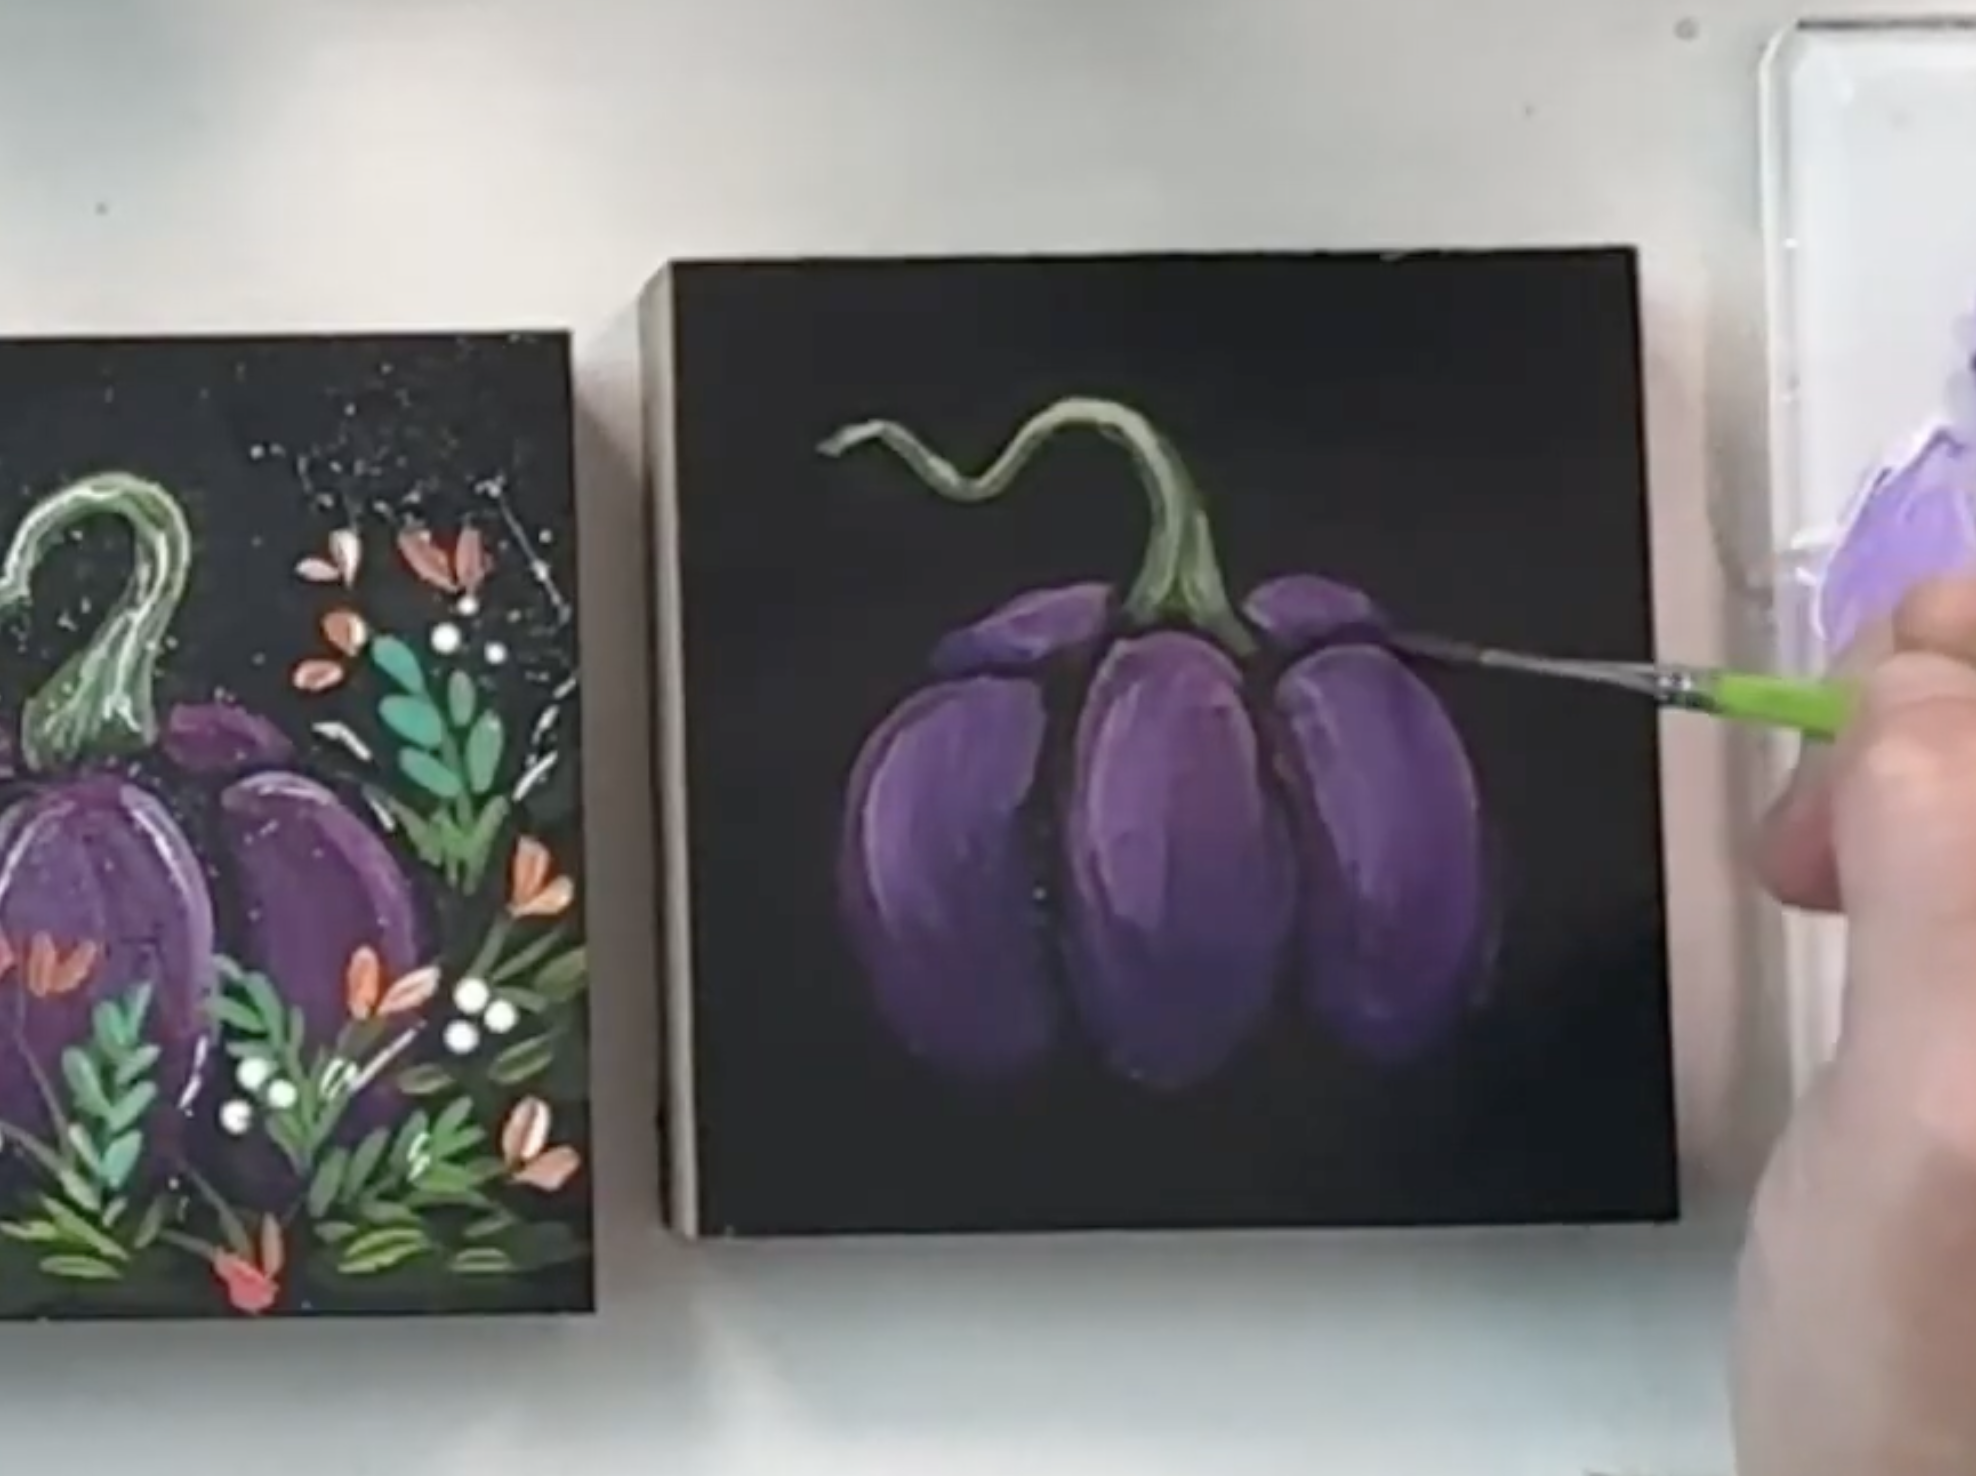
Step 2: Painting the Base
Using a flat brush (I used a ¼ inch), and start with Dioxazine Purple from DecoArt at the bottom of your pumpkin. Be sure to stay within your chalk lines, the lines help keep your shape defined and add that magical highlight later!
Next, layer Poetic Plum over the middle section. Blend it upward, leaving space at the top for a lighter hue. These rich purples blend beautifully, giving the pumpkin depth and personality.
Step 3: Adding Highlights
Grab your detail brush and mix in a bit of white with your plum and purple. Lightly brush highlights across the top and edges of your pumpkin. This helps it pop against the background. Don’t overthink it! A few light, feathery strokes are all you need.
Once dry, take a baby wipe and gently remove your chalk lines for a satisfying reveal moment. Once the chalk lines have been removed, you’ll be able to see if you need more highlights and if the pumpkin is standing out from the black background.
Step 4: Painting the Stem & Greenery
Mix a touch of Irish Moss Green with a bit of black for shading at the base of the stem. Add brighter greens or even a bit of teal for variation and whimsy!
Use your liner brush to make quick, playful “1-2-3” strokes for leaves and greenery. Keep it loose and organic — this isn’t meant to look realistic, just fun and flowy.
Step 5: Add Some Floral Fun
Mix Spice Pumpkin (orange), Dragon Fruit (pink), and White on your brush to create soft, two-stroke flowers. Press and lift your brush to create petal shapes. They’ll look like adorable little hearts! Scatter these blooms around your pumpkin to add bursts of color and cheer.
Step 6: Finishing Touches
Once your painting is dry, it’s time for the fun extras! This is my favorite part as it really adds details and personality to your piece.
- Splatter white paint using a toothbrush for a bit of whimsy.
- Use the end of your paintbrush to dot on tiny white accents.
- Add subtle gel pen scribbles or highlights to your stem or pumpkin curves for extra texture.
And there you have it — your Whimsical Purple Pumpkin is ready to display!
If you enjoyed this, be sure to check out the video tutorial on my YouTube. Painting this purple pumpkin is the perfect reminder that art doesn’t have to be perfect to be joyful. Whether you’re painting solo, with your kids, or at a paint party, take time to play, explore color, and enjoy the process. Happy painting, friends!
Stay connected with news and updates!
Join our mailing list to receive the latest news and updates from our team.
Don't worry, your information will not be shared.
We hate SPAM. We will never sell your information, for any reason.
