Make Your Water Sparkle: A Step-by-Step Tutorial
Jul 17, 2025
Hey there artsy friends, it’s Karen from Over the Artsy Moon! Today, I’m excited to share a magical and relaxing painting technique with you: How to paint beautiful, sparkly water that shimmers under a sunset sky.
If you’ve ever wanted to capture that dreamy shimmer on a lake at sunset, this easy-to-follow technique is perfect for doing just that. We will be adding a touch of sparkle to your seascapes, lake scenes, or anywhere you want that glittery water effect. Let’s dive in!
Create Your Base
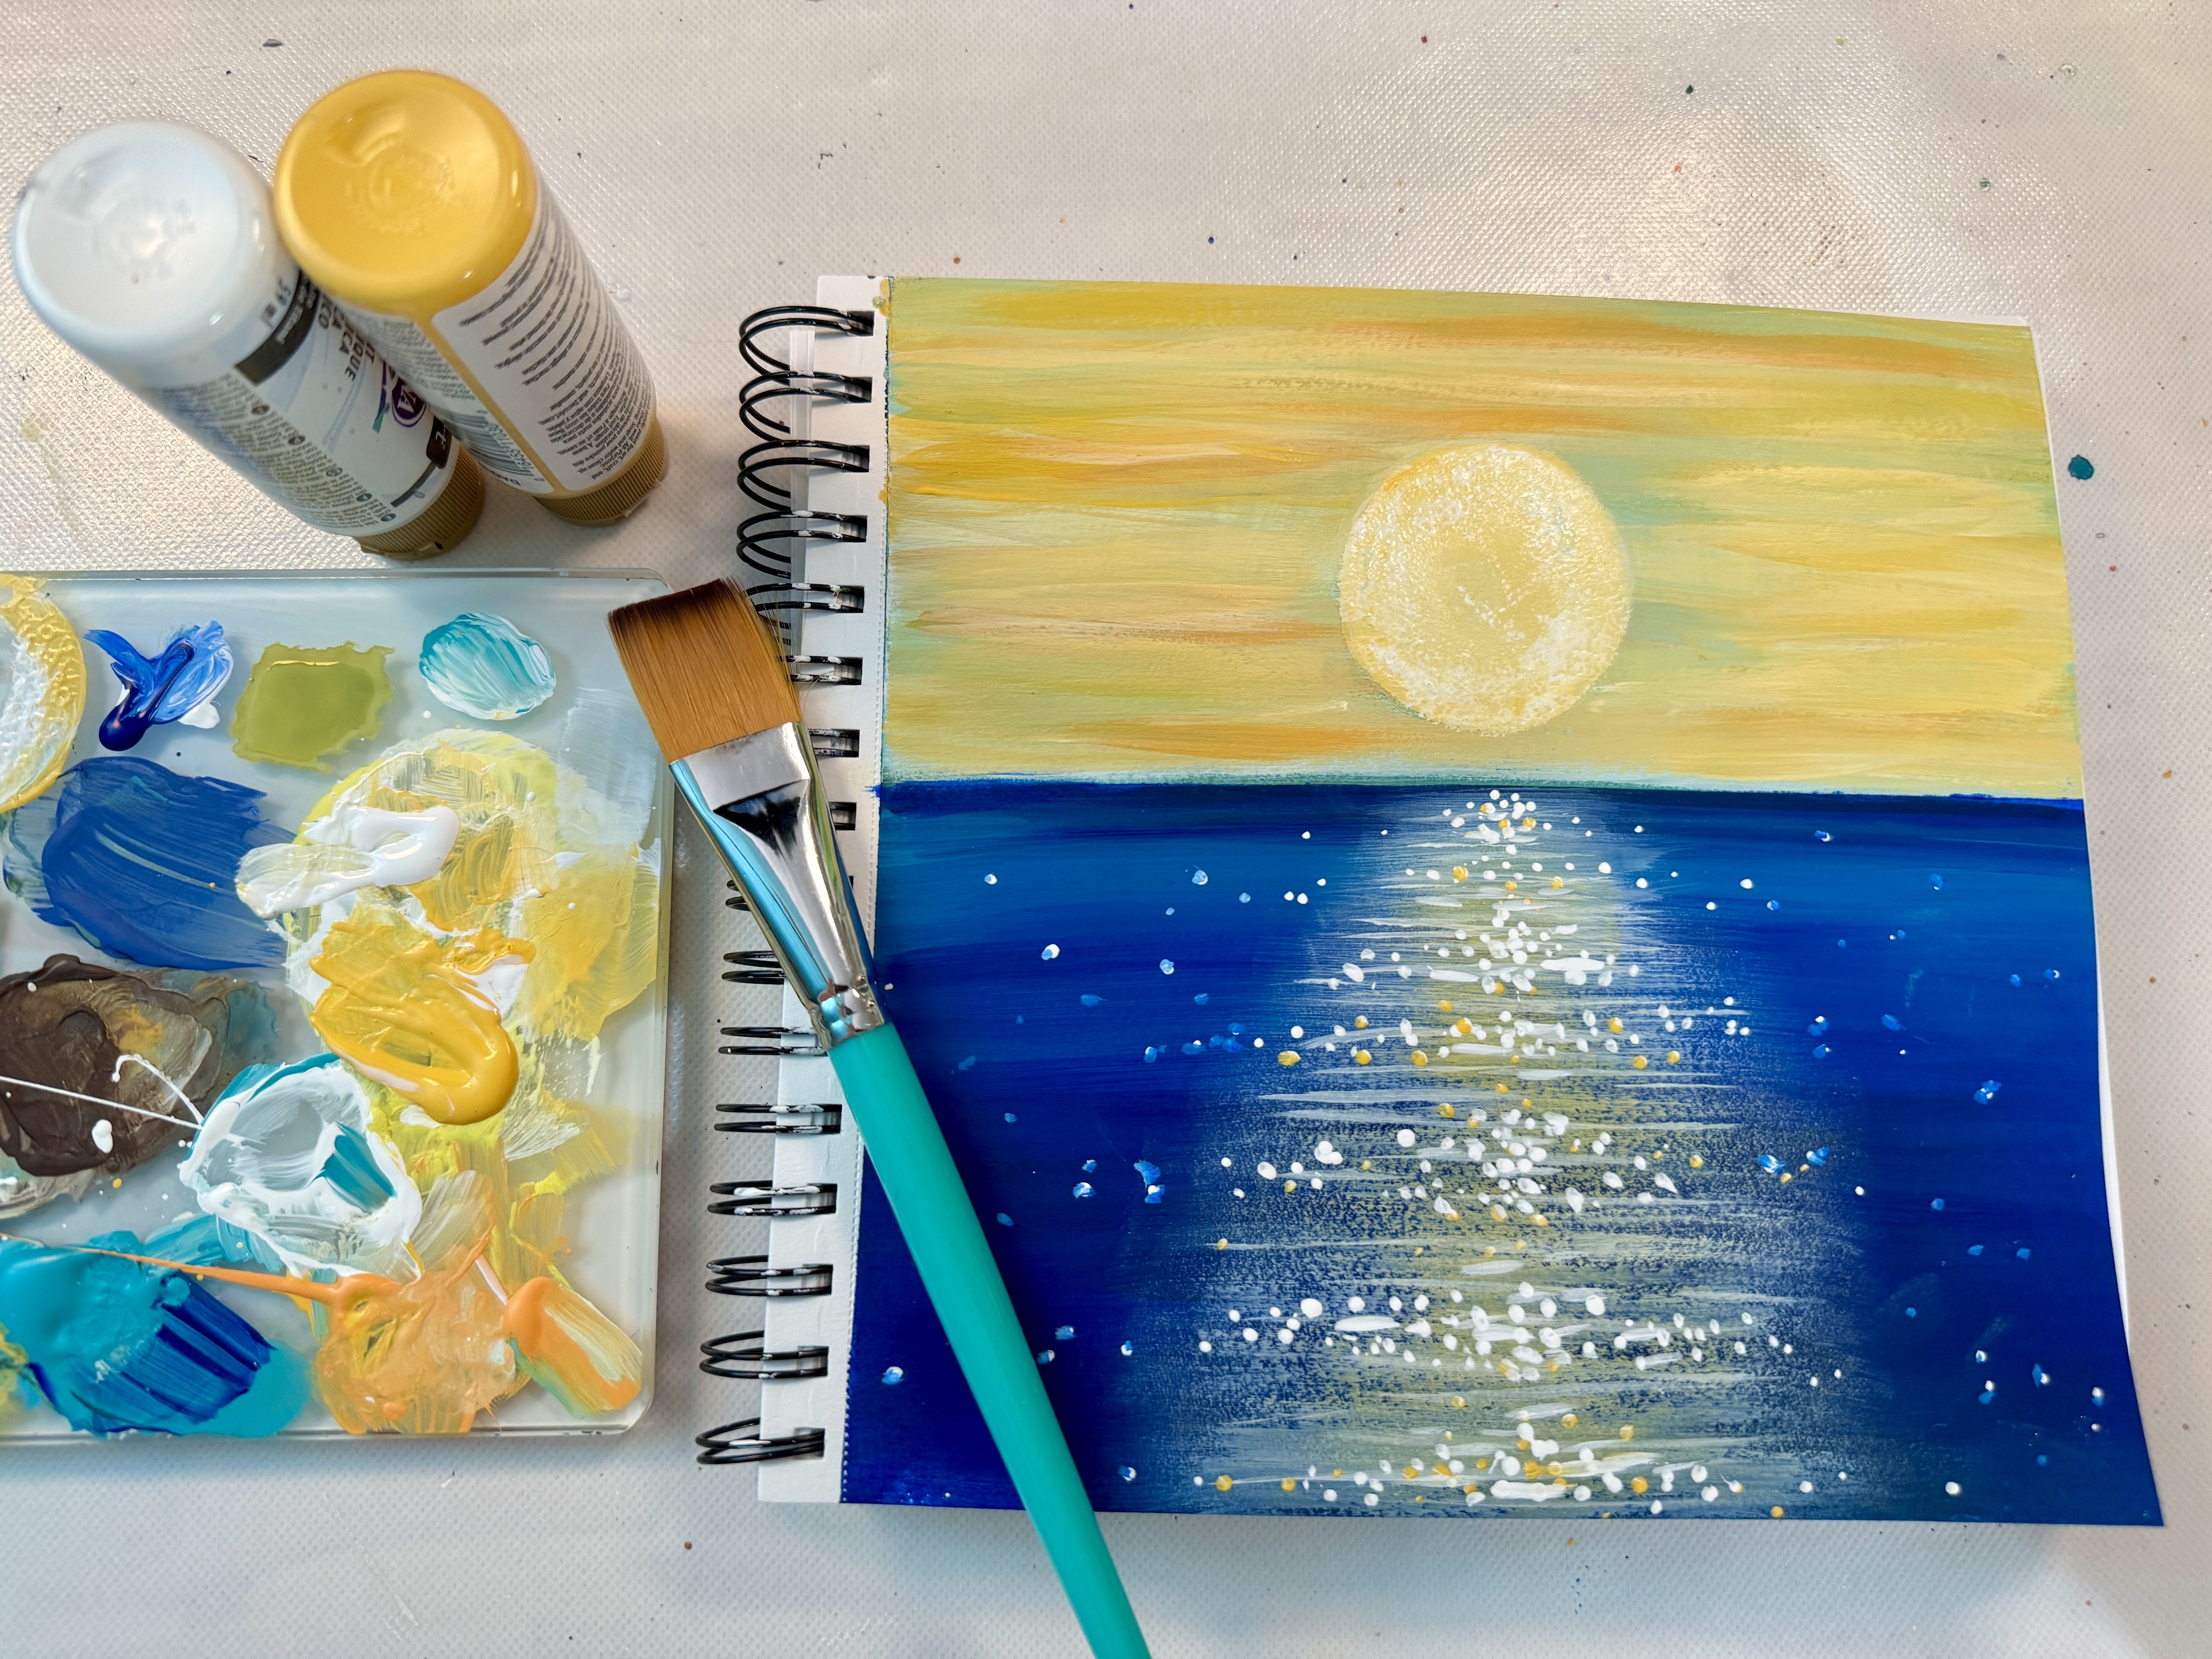
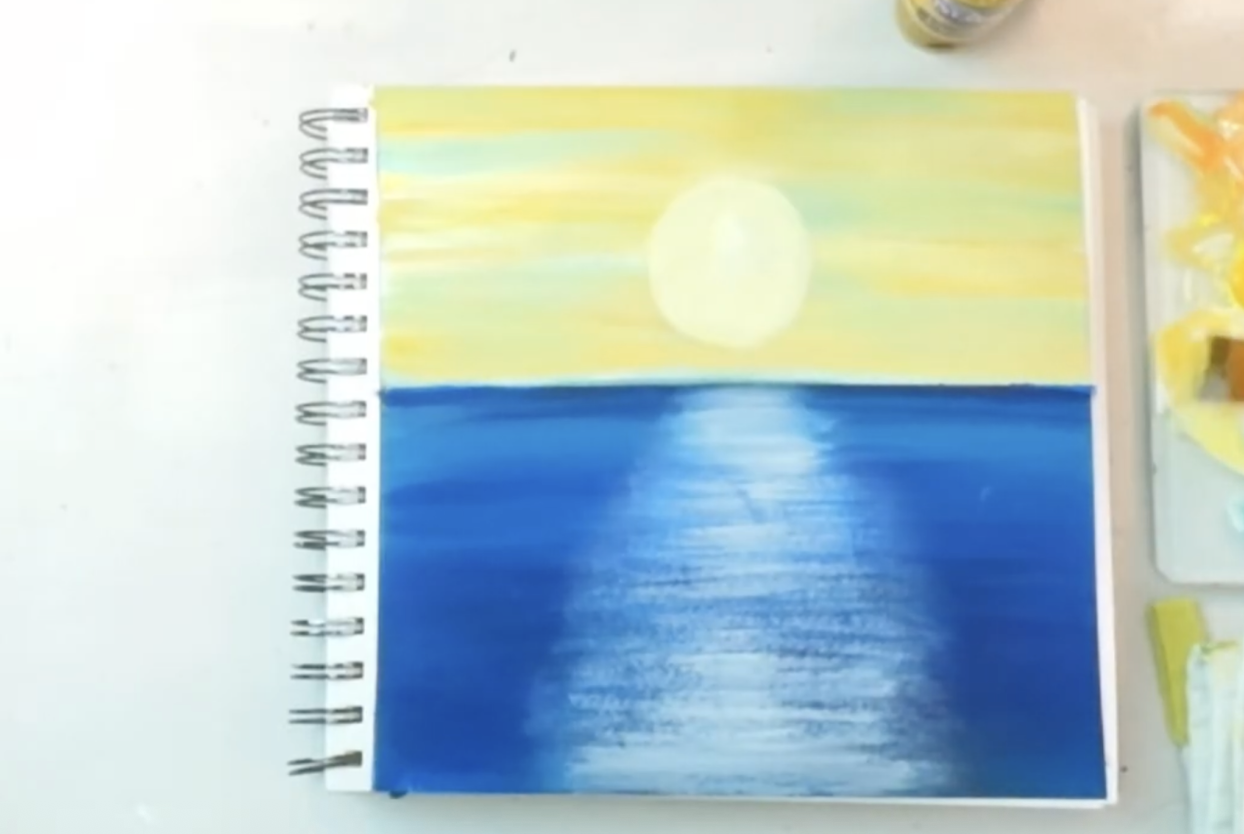
We’re going to get started with the beautiful base — a soft sunset sky above and a blue-and-white water surface below. The sun in my scene is a subtle, glowing white to keep things dreamy.
You can create a similar base using:
- A flat brush for smooth strokes
- Blue and white paint for the water
- Warm sunset colors for the sky
This part is all about relaxing and laying down your background. Let your sunset colors blend and let the water stay nice and soft — because the sparkle is about to steal the show!
Sprinkle the Sparkle
Ready for the magic? For the sparkling water, I used a dry-brush technique, which helps you build layers of light and color without overloading your brush.
1 - Start with white paint
Dip your flat brush in white paint, getting it into the bristles, and then blot off the excess on a paper towel. Starting near the sun’s reflection, lightly drag the brush back and forth across the water. You should still see the blue underneath. Keep your strokes narrow at the top (near the horizon) and wider as you move downward — this creates the illusion of distance.
2 - Add soft yellow
To warm up the sparkle and soften the edges, dry brush a bit of yellow over the white. Work your way down the water, blending lightly as you go.
3 - Create little waves of light
With a flat or liner brush, flick and pull small, horizontal strokes to suggest tiny sparkling waves. These should be closer together and finer near the top, getting slightly larger and farther apart toward the bottom.
Dotting the Details
Now, grab your smallest detail brush and…dot dot dot! Using a small detail or liner brush:
- Dip into white paint and dot tiny highlights under the sun’s reflection, concentrating them in the center.
- Add more dots as you move downward, spacing them out and making them slightly larger the closer you get to the bottom.
- For extra glow, mix in a few yellow dots in the center of the reflection for warmth.
Feel free to experiment —the more you add dots, the more magical it looks!
Optional Touches
If you want to tone down any “oops-too-bright” spots, just layer a bit of soft blue over them. And if you’re feeling fancy, add a few dashed white lines right in the middle for a super shiny finish. Remember, the magic happens in the layering, so take your time and enjoy the process.
Inspired by the Artsy Moon Paint Club
This technique is one I used in a full painting for the Artsy Moon Paint Club — a serene kayak on a sparkling lake at sunset. The Paint Club is where we share our art that we have created step-by-step. If you liked this little sparkly adventure, you’ll LOVE what we do inside the Club. Come join us! Don’t forget to subscribe to my YouTube channel for more tutorials just like this one and creative inspiration!
Stay connected with news and updates!
Join our mailing list to receive the latest news and updates from our team.
Don't worry, your information will not be shared.
We hate SPAM. We will never sell your information, for any reason.
