Textured Backgrounds & Blooming Florals: A Playful Painting Tutorial
Apr 10, 2025
Hey there, artsy friend! Karen here from Over the Artsy Moon, and today I’m showing you how to take a handful of colors and turn them into a blooming beautiful masterpiece. We’re talking textures, layers, color mixing, and of course—florals! 💐✨
Grab your paint brushes (and a crumpled-up piece of plastic wrap 😄) because we’re diving into a whimsical project that’s super fun and surprisingly simple!
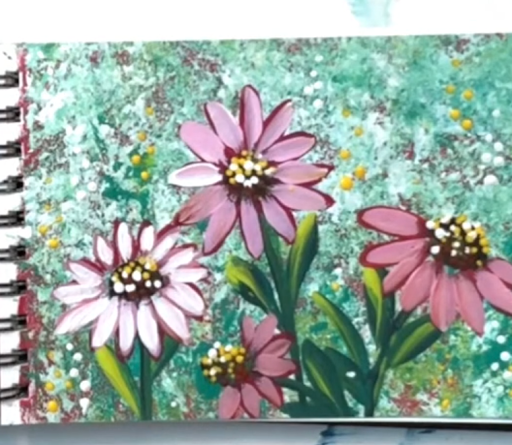
Step 1: Let’s Create That Fun, Textured Background!
Start by putting Magenta, Citron Green, Bluegrass Green, and White on your palette. You’ll want a nice amount of paint to play with here. Paint the background a solid color — I used Magenta for that bold, vibrant base. Brush strokes don’t need to be perfect or even—just get the color on there!
Now for the fun part—texture! Take a crumpled piece of plastic wrap, dip it into Bluegrass Green (or any teal will do), and dab it all over your background. It’s like finger painting for grown-ups! Using the same piece of wrap, repeat the process with Citron Green. You’ll start to see a blended texture appearing on your surface. Finish it off with a little White on that same plastic wrap—lightly tapping it across the surface. Your layers will likely look different than mine.
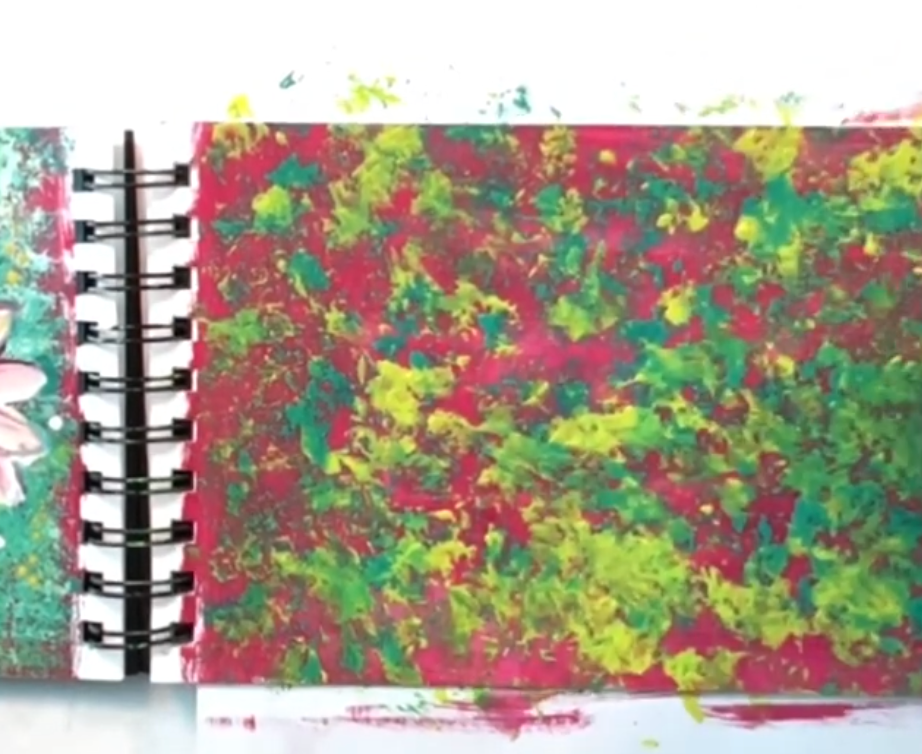
Pro Tip: You can keep blending, tapping, and layering until you get the magical mix you love. Press a little harder if you want your colors to blend into each other more. However, if you mix too much, you may end up with more of a muddy color.
Step 2: Time for Stems & Leaves
Now that your background is fabulous, let’s move on to the florals!
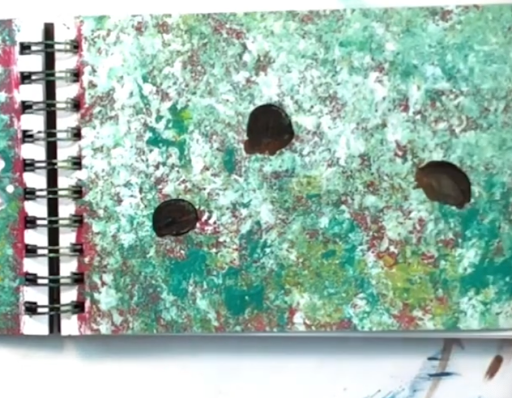
Grab your angle brush and dip it in a bit of Black and Burnt Sienna. Swirl them together and paint the centers of your flowers.
Without rinsing, add a little Bluegrass Green and begin painting the stems. Follow your instincts—let the natural flow of the background guide how your stems are formed.
Mix Bluegrass Green with Citron Green to create your leaves. Use short, curved strokes to add them along the stems.
Step3: Painting the Petals
Time to make those florals pop! Switch to your round brush and load it up with Magenta. Paint your first layer of petals around the flower centers. Don’t stress if they look rough—first layers are always a little funky!
Mix Magenta with Bright Yellow to create a lighter, peachy pink for your next round of petals. Alternate between the magenta and this mix to create layers of color and depth.
Using the back end of your brush, dip it into Burnt Sienna and add some dots to the center of your flowers. Repeat the process with Bright Yellow, and finally White—layering those tiny details for an extra bit of charm.
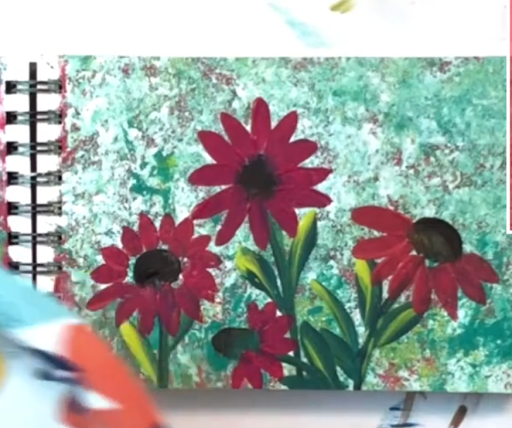
Step 4: Highlights and Final Details
Now for the finishing touches! Mix a little Magenta with White and use your round brush to pull strokes inward toward the flower centers. This softens the look and gives your petals more life.
Add subtle white highlights to your leaves and stems to make them pop.Want to sprinkle a little extra joy in the background? Dip the tip of your paintbrush handle into White or Bright Yellow and add tiny dots throughout. It’s a little touch that makes a big difference!
Bonus: More Texture Tools!
Love that crumpled wrap texture? Try these other tools for even more creative fun:
- Bubble wrap – because who doesn’t love bubbles?!
- Cardboard edges – perfect for scraping and dragging cool lines across your canvas.
Wrap-Up: Let Your Creativity Bloom!
This playful project is all about experimenting, layering, and letting your flowers grow wild and free! Whether you're painting with friends or just having a solo art night, these steps will help you create something truly magical. Want to watch this tutorial for yourself? Catch the replay here!
Looking for More Creative Inspiration?
Join my creative community, the Artsy Moon Paint Club! 🎨✨ It’s filled with amazing creatives just like you who are ready to take their painting skills to the next level. With over 120 painting tutorials, you’ll never run out of inspiration for your next masterpiece! Come paint with us—join today!
Stay connected with news and updates!
Join our mailing list to receive the latest news and updates from our team.
Don't worry, your information will not be shared.
We hate SPAM. We will never sell your information, for any reason.
