DIY Patriotic Decor: Oh My Stars Stencil on Canvas
Jun 06, 2025
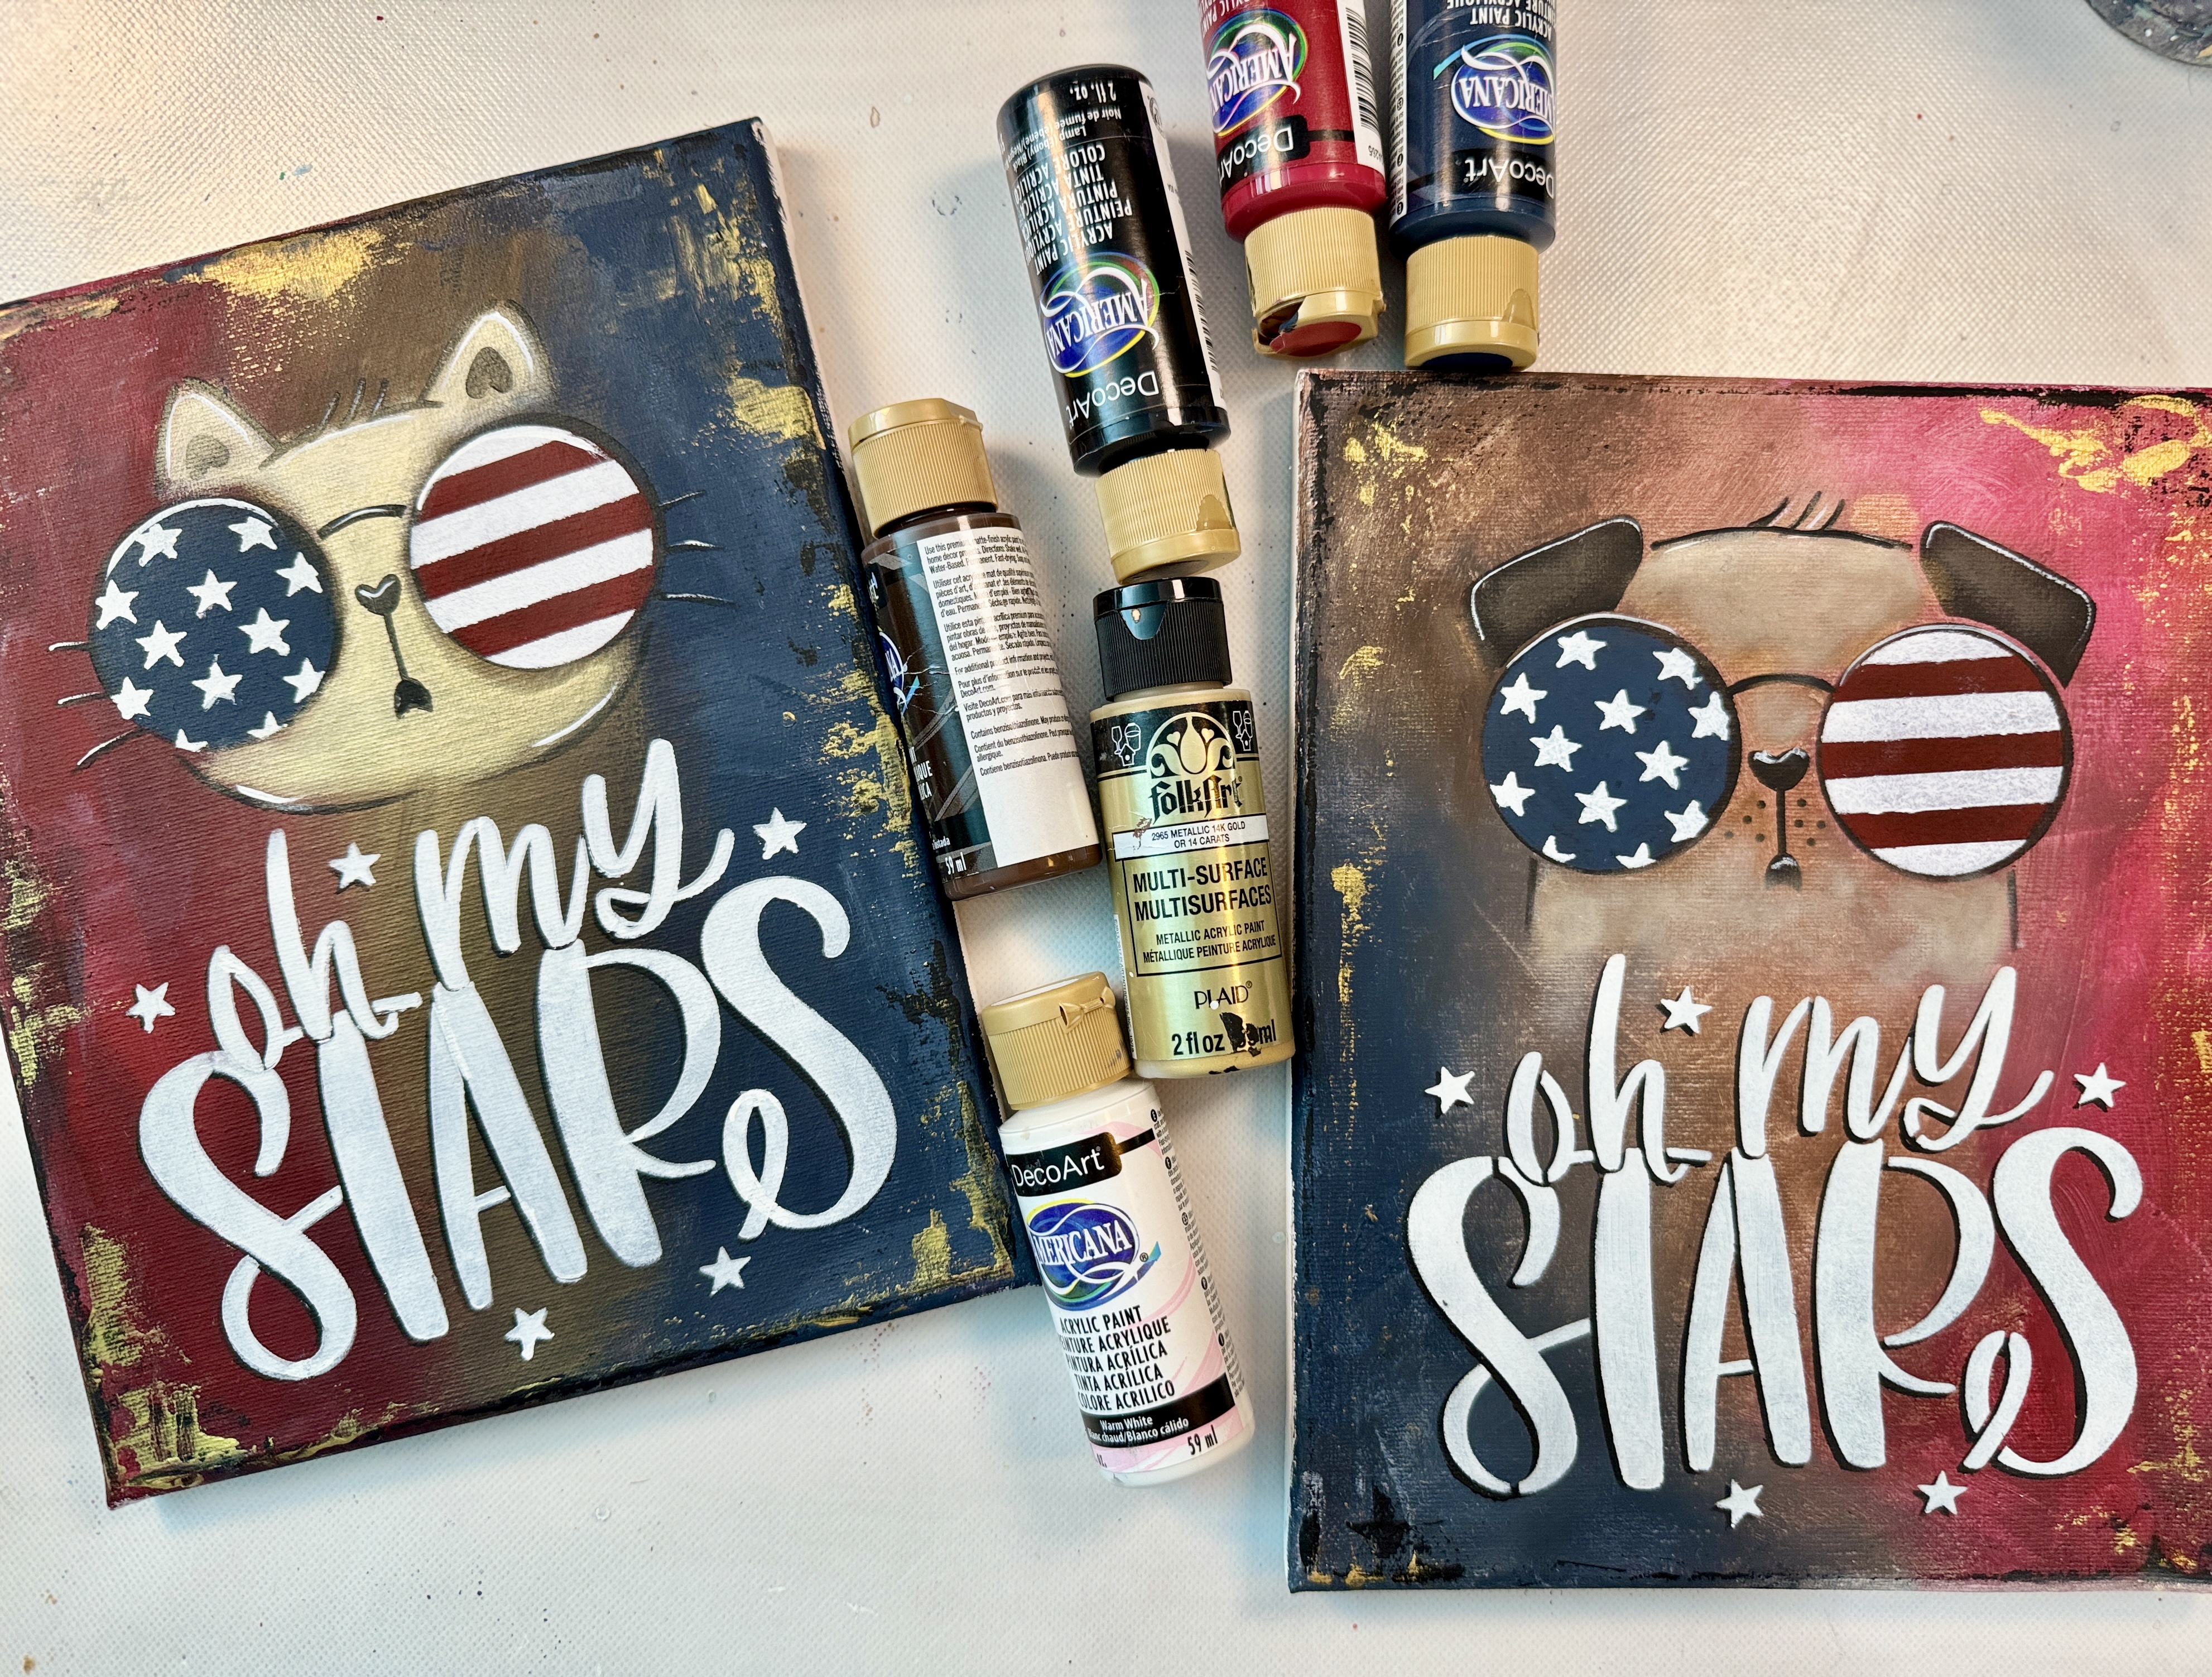
Looking for a fun and easy way to create your own patriotic decor? I’ve got just the thing! I recently used the Oh My Stars stencil from The Stencil Smith to create a starry canvas design that’s perfect for summer — especially for the 4th of July, Memorial Day, or even just adding a bold pop of Americana to your space.
Getting Started with the Background
I begin by grabbing a ¾ inch flat brush and some Tuscan Red paint, blending it with Burnt Umber in the corner of my canvas (which is 8x10"). I’m keeping it fast and furious here—just getting some background color in before laying down the stencil.
Next, I bring in Deep Midnight Blue—a lovely navy tone that blends really well with Tuscan Red, giving it a soft patriotic feel. I don’t rinse my brush between colors, which actually creates a nice variation. You could keep things neat and stripe-like, or blend it more organically—whatever works for your style.
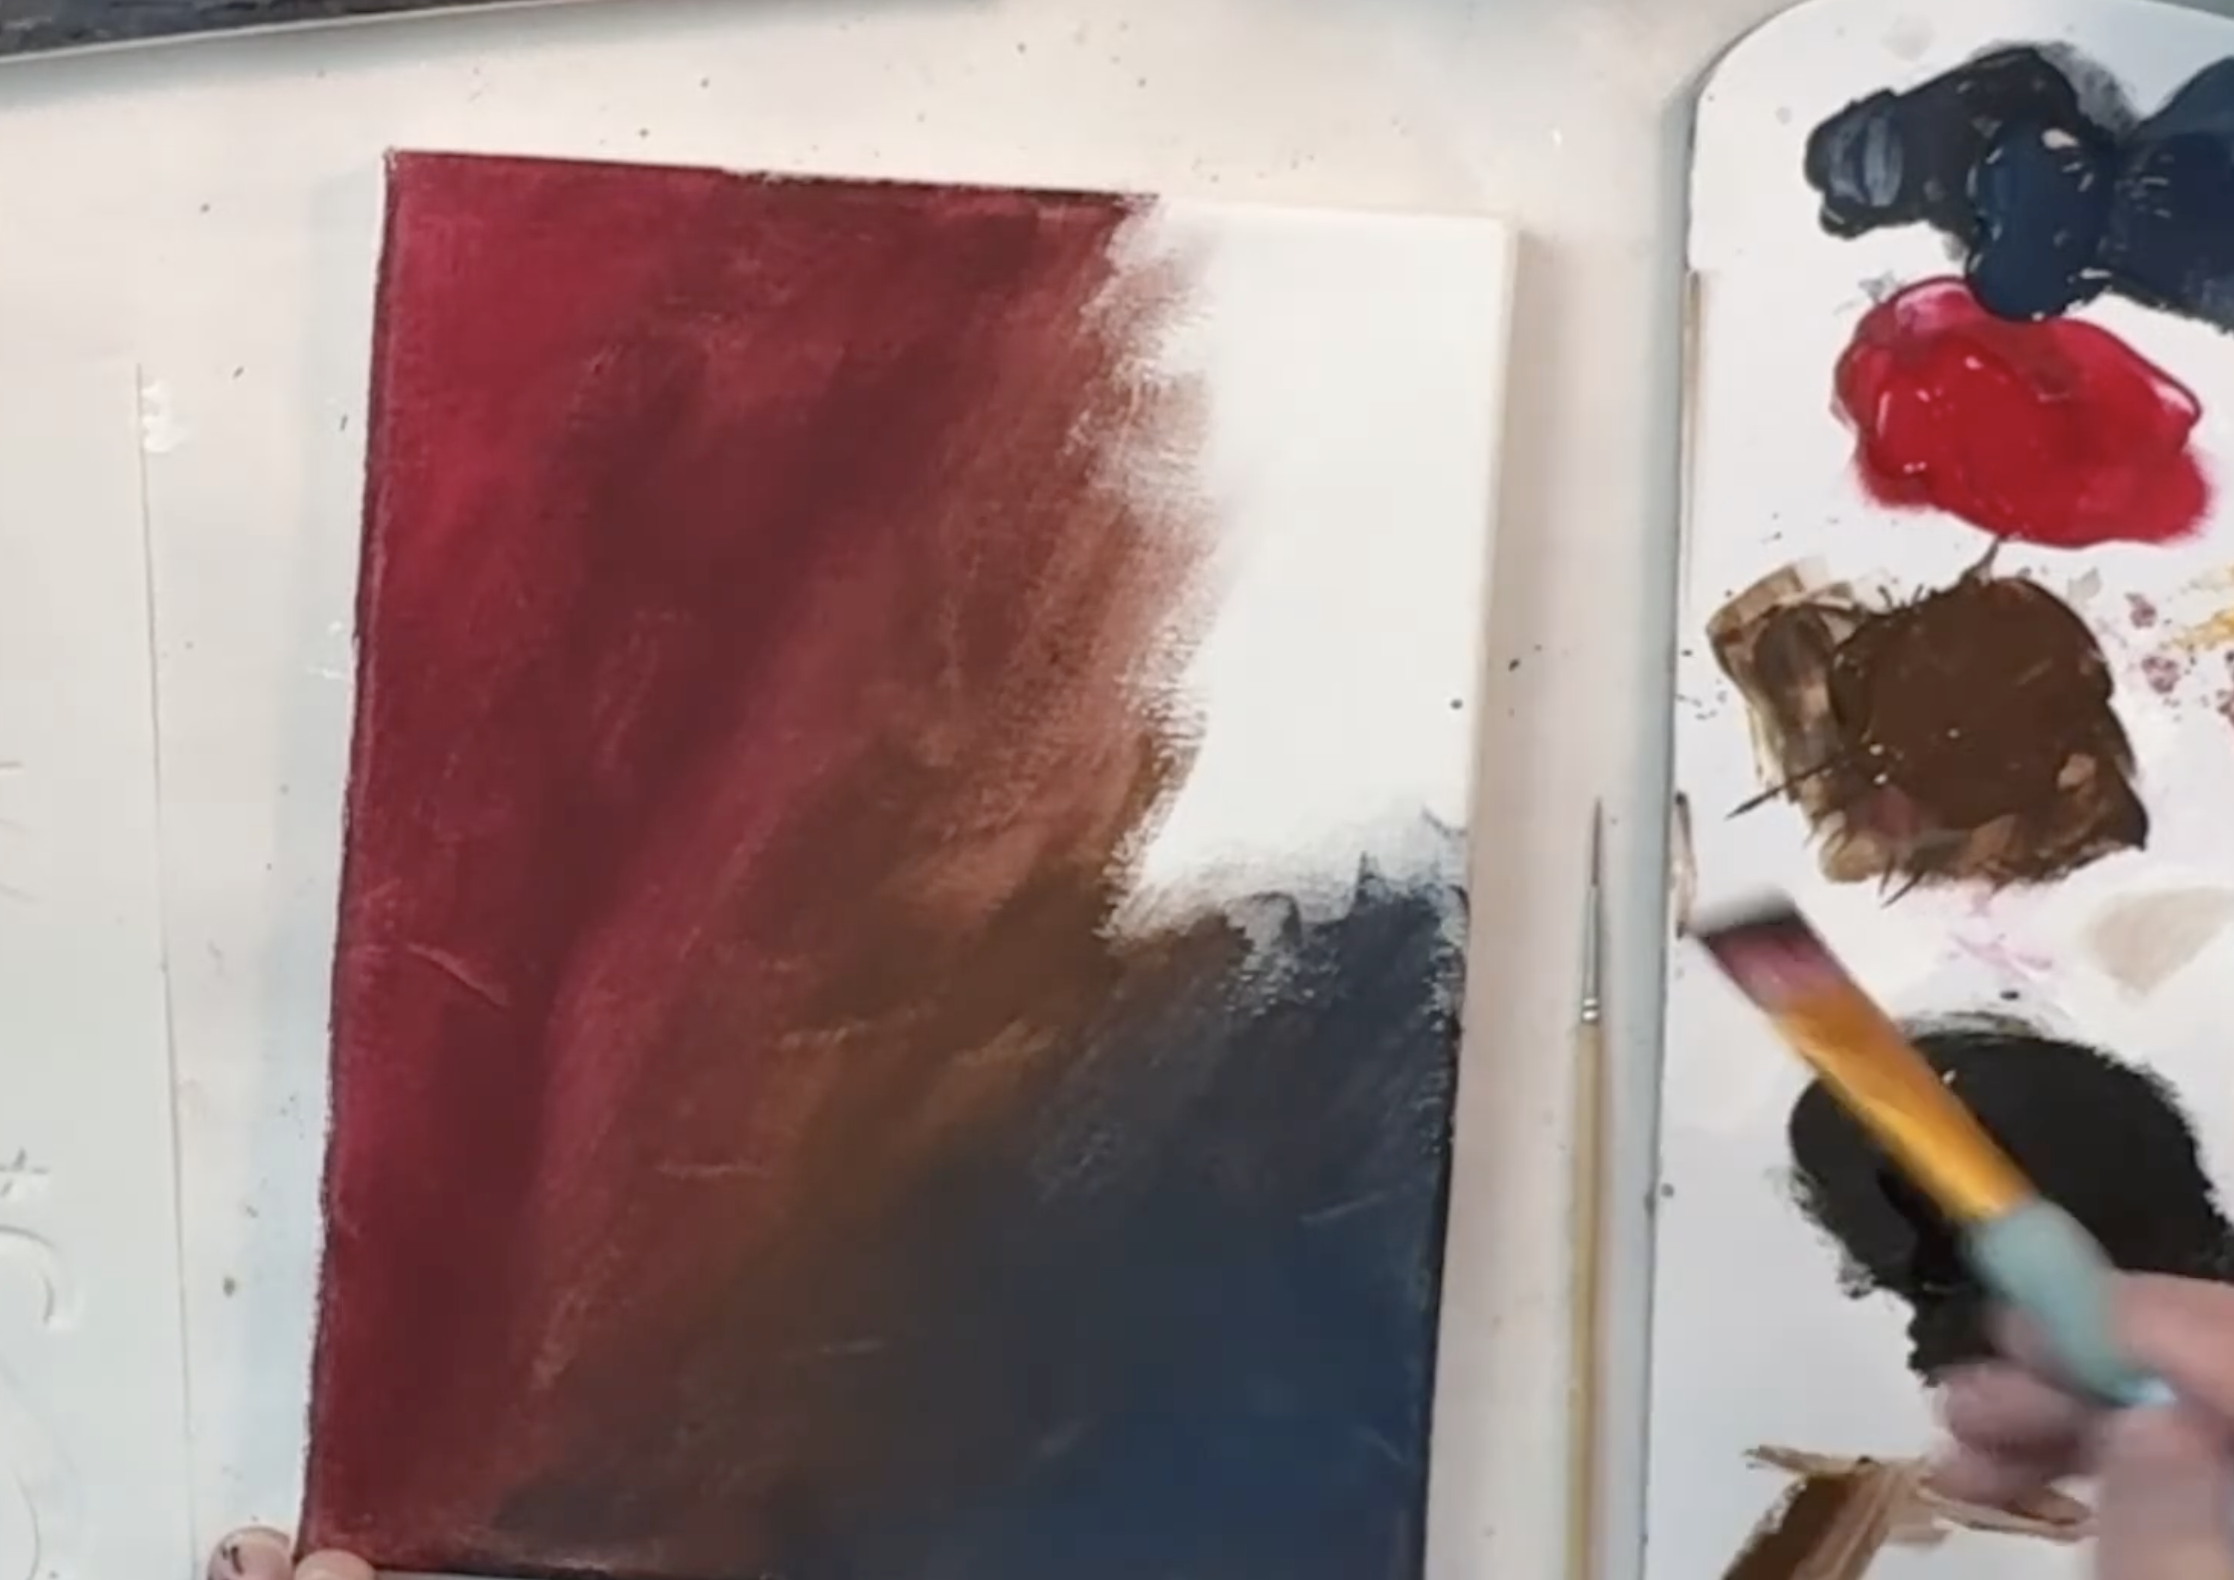
After the first layer dries a bit (you’ll notice I give it a quick dry to keep things moving), I add a touch of metallic 14K gold in the center for some shimmer. This is FolkArt Multi-Surface paint and it really pops!
Let’s Talk About this Stencil
I used the Oh My Stars Stencil from The Stencil Smith in a size XSM, #9449. This size fits beautifully on an 8x10” canvas, leaving you just enough room for creativity while making a bold, beautiful impact. The extra small stencil gave me full coverage on the canvas and was super easy to use with my favorite paints. Don’t forget to use my code ARTSYMOON at checkout for 15% OFF your order! I’m an affiliate for TheStencilSmith.com which means I will receive a small portion of the sale if you purchase through my link and you get a discount! I truly love using their products. They have a huge variety of high-quality, reusable stencils for all kinds of projects.
Time to Stencil
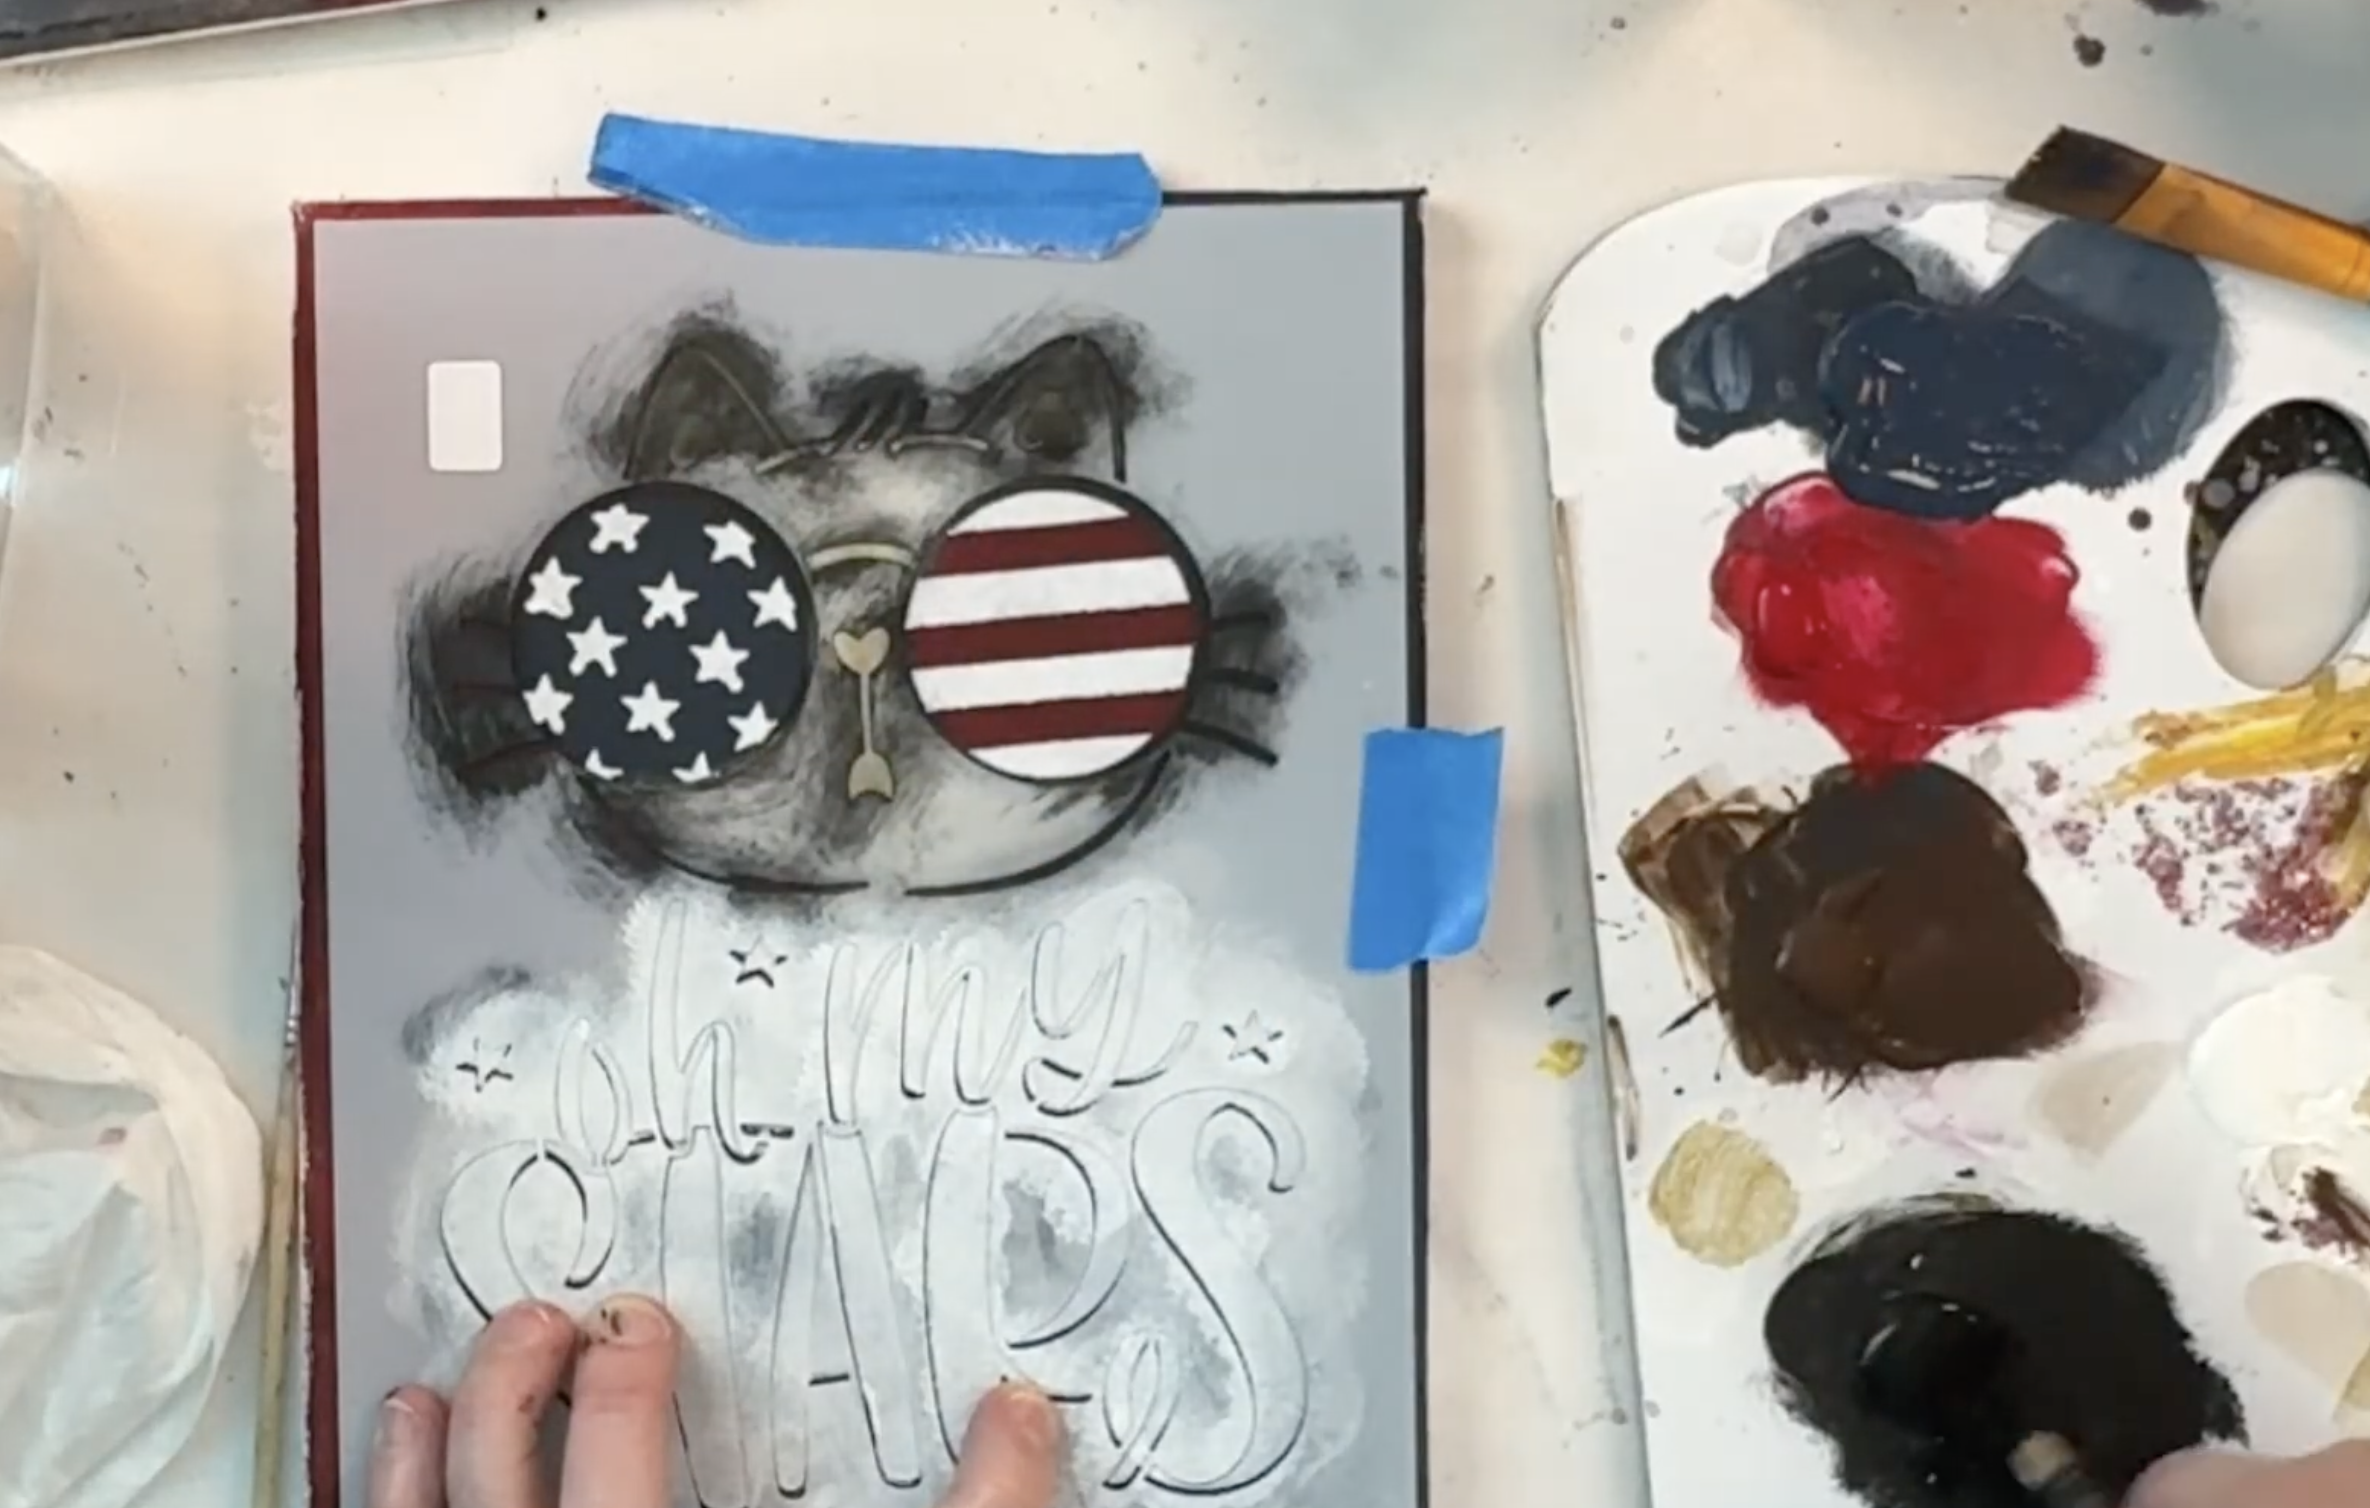
Once the background is complete, I tape down the stencil—which is made of sturdy Mylar plastic—and begin applying black paint with a dry stencil brush. Be sure to offload the brush first on a paper towel so the paint doesn’t bleed under the stencil. Start with larger areas and go light on the small details.
If any areas like the letters have gaps (common with stencils), you can fill those using a liner brush and watered-down paint. Just glide your brush across the bridges (like in the “A” or “R”) to fill them in.
Next, I line up the overlay stencil for the cat image and add my red and white accents. Again, offloading the brush is key—especially when working close to edges.
Finally, I place the white offset stencil layer over the sunglasses area, line it up just right, and stencil gently in layers. Using a light hand and several passes gives you crisp results without bleeding.
Stenciling Tips
- Don’t wet your stencil brushes before use.
- Offload excess paint to avoid bleeding under the stencil.
- Line up overlays carefully—small misalignments are okay!
- Fix stencil bridges with a liner brush and slightly watered-down paint.
- Have fun and experiment—there’s no perfect way to blend your background!
If you’re new to stenciling or painting, I hope this tutorial helps you feel confident. The key is learning the methods and practicing until it clicks—and then the real fun begins. And - worst case scenario - there is a little bleed under the stencil, a few paint strokes will fix that right up!
Be sure to watch the replay of this fun tutorial on my YouTube channel, and if you need high-quality stencils or brushes, check out The Stencil Smith and use my affiliate code, ARTSYMOON, for a discount.
Join my membership — The Artsy Moon Paint Club!
In my membership, The Artsy Moon Paint Club, creativity meets community, with exclusive tutorials, step-by-step projects, painting tips, and a whole crew of fun-loving creatives cheering you on. Whether you're a total newbie or a seasoned painter, you'll feel right at home. Let's make some art magic together!
Stay connected with news and updates!
Join our mailing list to receive the latest news and updates from our team.
Don't worry, your information will not be shared.
We hate SPAM. We will never sell your information, for any reason.
